Keep Web Roles & Cache Servers on Same Virtual Network
It is highly recommended that you deploy your cache servers and web roles on the same virtual network to get the best performance out of your caching servers. To achieve this on Microsoft Azure, please follow the steps given below:
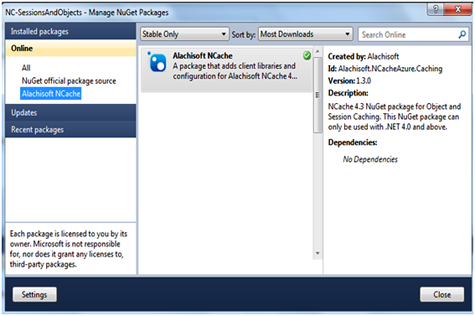
Download the NCache for Azure NuGet package directly from the NuGet website. You then need to add it in Visual Studio using NuGet Package manager and install it in your web role project. This will automatically include all required NCache assemblies and configuration files in the Microsoft Azure project.
Step 2. Verify NCache for Azure Assemblies
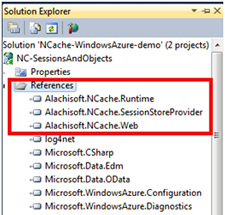
Verify that the following assemblies (shown in figure below) are added in project references as soon as NCache for Azure NuGet package has been installed:
- Alachisoft.NCache.Runtime
- Alachisoft.NCache.SessionStoreProvider
- Alachisoft.NCache.Web
This will also include the dependant assemblies i.e., Log4Net.dll, Protobuf-net.dll and Oracle.DataAccess.dll
Step 3. Verify NCache for Azure Configurations
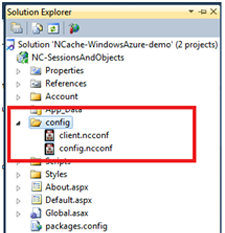
Verify that Config folder containing the NCache for Azure configuration files (Client.ncconf and Config.ncconf files) is added to the project.
Step 4. Configure Network Settings of Web Role
For single site deployment where cache servers and clients are on same virtual network , add the web role network settings within the "ServiceConfiguration.Cloud.cscfg" file.
These settings dictate that web role be deployed on the same virtual network and subnet where NCache servers are residing:
<NetworkConfiguration>
	<VirtualNetworkSite name="NCacheVirtualNetwork"/>
		<AddressAssignments>
			<InstanceAddress roleName="NC-SessionAndObjects">
				<Subnets>
					<Subnet name="NCacheSubnet" />
				</Subnets>
			</InstanceAddress>
		</AddressAssignments>
</NetworkConfiguration>Client.ncconf file is used to connect to any clustered cache. It contains server IP addresses where the clustered cache resides. For connecting to an already configured cache on Microsoft Azure VMs, it is important to modify the Client.ncconf file. You can update this file as follows:
For single site deployment: If the Web Role is going to be deployed in the same Virtual Network as the Virtual Machines then there are no special modifications involved.
Here is a sample cache tag for cache named “Democache” configured on Microsoft Azure VMs with IP addresses 10.0.0.4 and 10.0.0.5
<cache id="Democache" client-cache-id="" client-cache-syncmode="optimistic" default-readthru- provider="" default-writethru-provider=""  load-balance="True">
	<server name="10.0.0.4"/>
	<server name="10.0.0.5"/>
</cache>
Web-role should be able to connect to the cache without any explicit port forwarding here.


