NCache 4.4 - Online Documentation

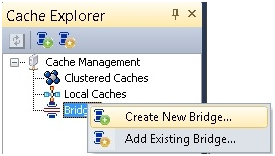
Creating Clustered Bridge

 
A bridge can be created in NCache and caches are added in it using the following method:
 
Using NCache Manager
 
  • From the Cache Explorer view, right click the Bridges node and then click Create New Bridge option.


  • The New Bridge Wizard appears, displaying the Specify Bridge Identification dialog. Please provide the Name for the
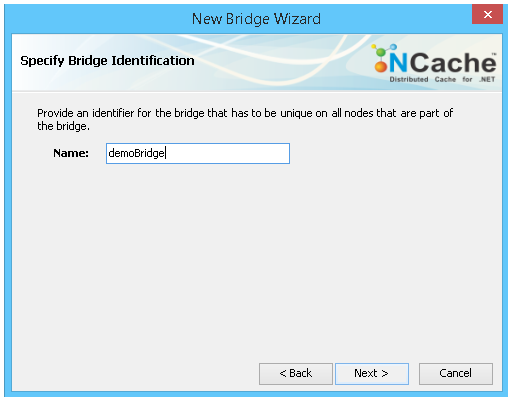
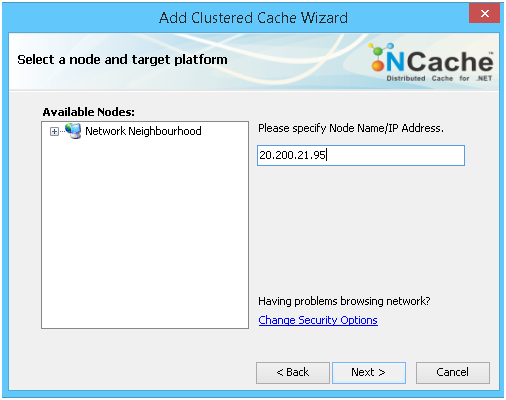
new bridge and click on the Next button.


  • Select Bridge Member Nodes dialog opens up.
 
 
  • Speicfy the node IP address in text box or select from the Network Neighborhood and click on the ‘>’ button to add it in selected nodes list. Click on the Next button once all required nodes are added.
 
 
  • Specify Queue Parameters dialog box appears. Here, you can specify the multiple bridge properties, i.e., Bridge Port, Maximum Queue Size, and Replicator Queue Size.


  • After providing the required values click Next.
  • On the Specify Target Cache Options dialog box, you can change the Queue Replication Interval and Connection Retry Interval values. There is also a check box Start this bridge on Service restart. Check it if you want to start this bridge automatically when NCache bridge service starts.  Click the Finish button to proceed ahead.
 
 
  • Your bridge will be successfully created and will be visible in the Cache Explorer view under the Bridges node.


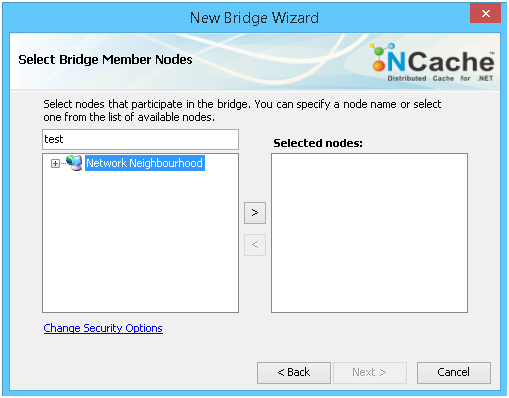
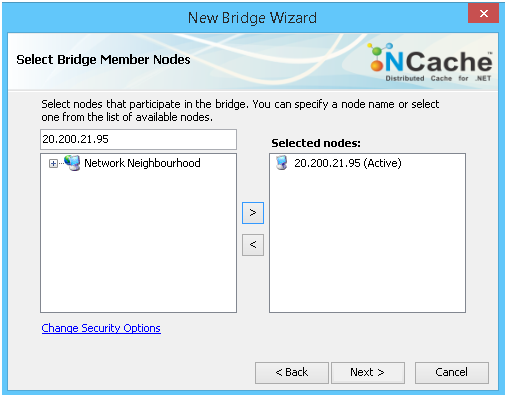
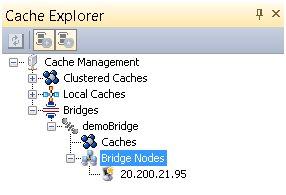
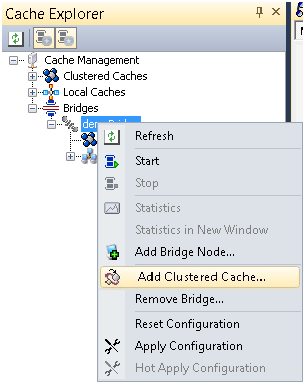
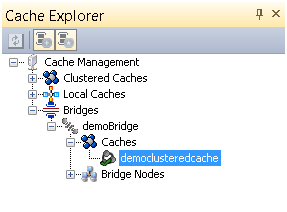
Adding Clustered Caches to the Bridge
 
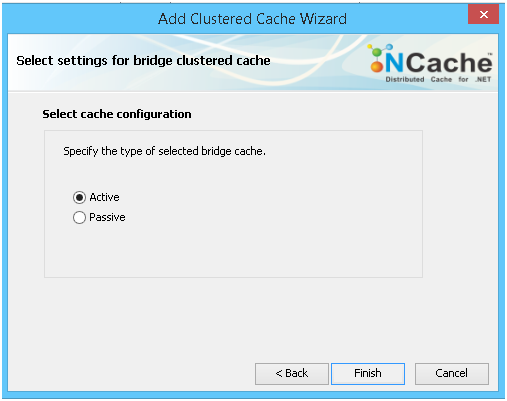
Depending on your bridge topology, you can add two caches to your bridge. The caches that you want to add should already be created on the local server or on remote server(s). Please follow these steps to add a cache to your bridge:
 
  • From the Cache Explorer view, right click the bridge to which you want to add a cache and then click on the Add Cluster Cache option.
 
 
  • On the Add Clustered Cache wizard,  specify the server IP address in text box or select from the Network Neighborhood listed in Available Nodes list box and click Next button:
 
 
  • Select a clustered cache dialog window, all of the caches on your provided server are listed. Choose any one cache and click Next.
 
 
  • On the Select settings for bridge clustered cache dialog, choose the cache mode for this bridge configuration.
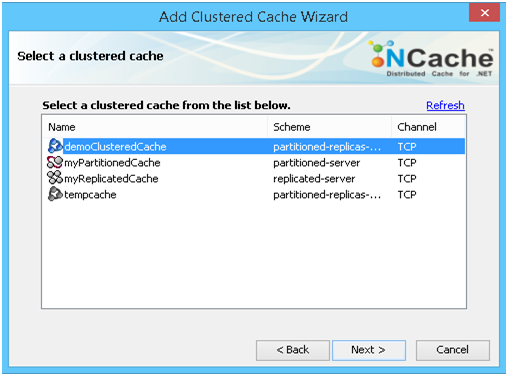
  Default cache mode is Active, but you can change that.
 
 
  • The selected cache will successfully get added for this bridge and will be visible under the Caches node of the bridge.
 
 
  • Add the 2nd cache for this bridge using same steps mentioned above.
 
See Also