Configure JSON Query Indexes
JSON (Javascript Object Notation) is an open standard file and data interchange format. It consists of attribute value pairs in human-readable format. NCache allows you to specify attributes that need to be indexed within a JSON document by configuring JSON query indexes.
Add JSON Query Indexes
These attributes can be configured in the following ways:
Using the NCache Management Center
Launch the NCache Management Center by browsing to http://localhost:8251 or
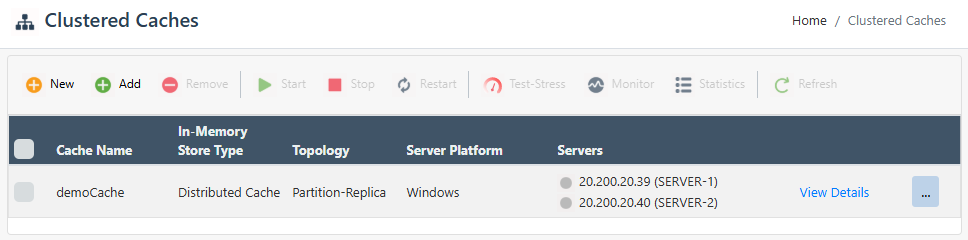
<server-ip>:8251.In the left navigation bar, click on Clustered Caches or Local Caches, based on the cache to which the query index will be added. Against the cache name, click on View Details.
Note
Make sure the cache is stopped.
This opens up the detailed configuration page for the cache. Go to the Advanced Settings tab and click on Query Indexes in the left bar.
This opens up the Query Indexes page, click on Add.
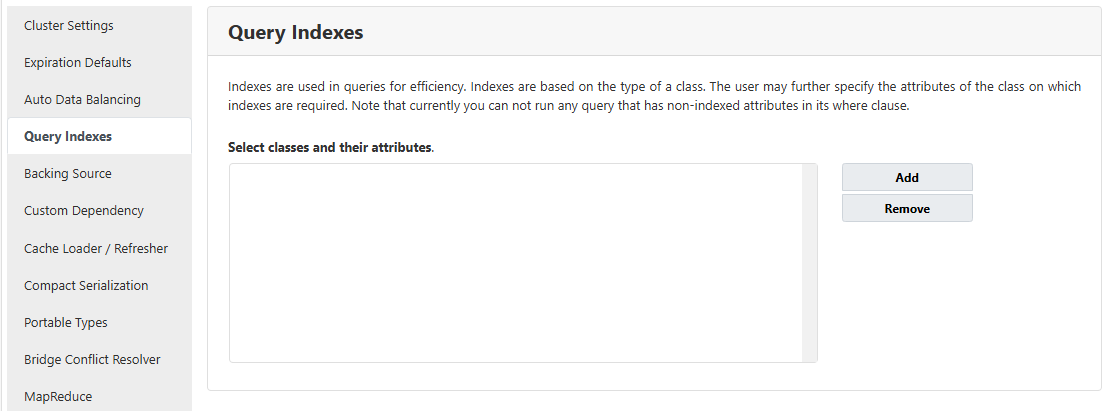
On the next page, select the JSON file that contains the classes that you want to store in the cache for querying by clicking on the Browse button.
In the Browsed Assemblies box, all serialized classes are displayed. Check the ones you want to index, and click on Add Selected Classes.
Important
Make sure the Index_Class attribute in your JSON file is defined. You should assign the FQN of your class as a value to this attribute

- The added classes will be displayed in the list of selected classes. Here you can select the attributes that you want to index. Their type is also parsed from the JSON file, but you also have the option to assign your attributes a different type from the dropdown menu placed next to them.
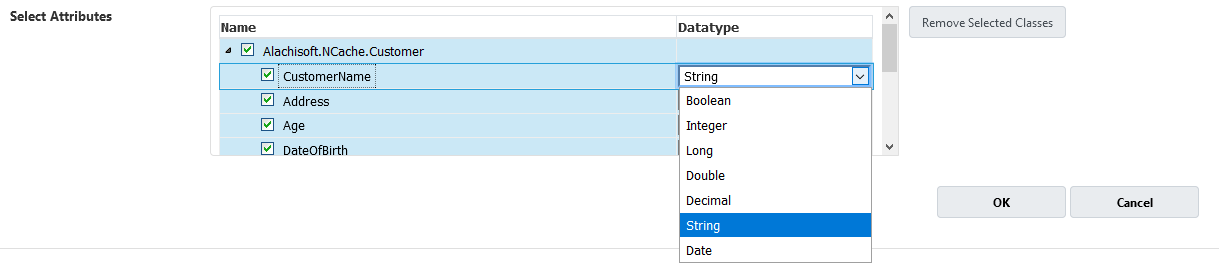
You can also remove any classes from the list of selected classes by clicking on the Remove Selected Classes button.
Once you are done, click on the OK button.

- The added query indexes will be displayed on the Query Indexes page. Click on Save Changes to apply this configuration to the cache.
Using PowerShell
- The Add QueryIndex cmdlet adds JSON-based query index for the attributes CustomerID and FirstName whose data type will be String and Integer respectively in cache on server 20.200.20.11.
Add-QueryIndex -CacheName demoCache -JsonFilePath C:\data.json \
               -Class Data.Customer -Attributes CustomerID$FirstName \
               -AttributeTypes Integer$String -Server 20.200.20.11
- The following command adds JSON-based query index for the attributes CustomerID and FirstName in cache using security credentials.
Add-QueryIndex -CacheName demoCache -AssemblyPath C:\data.json \
               -Class Data.Customer -Attributes CustomerID$FirstName \
               -Credentials(Get-Credential john_smith)
Manually Editing NCache Configuration
You can also manually edit the NCache configuration to configure query indexes as explained below.
Important
Make sure the cache is stopped before making any configuration changes.
- Specify the query indexes through config.ncconf by adding the
<query-indexes>and<query-class>tags under the<cache-settings>tag. The following example adds attributes of a class Product as indexes:
<cache-settings ...>
    <query-indexes>
        <query-class id="Data.Product" name="Data.Product">
            <query-attributes id="Id" name="unitPrice" data-type="System.Int32"/>
            <query-attributes id="category" name="category" data-type="System.String"/>
            <query-attributes id="unitPrice" name="unitPrice" data-type="System.Int32"/>
            <query-attributes id="isContinued" name="isContinued" data-type="System.Boolean"/>
        </query-class>
    </query-indexes>
</cache-settings>
- Once the changes are made, start the cache, and restart the NCache Service.
Removing JSON Query Indexes
Pre-defined query indexes can be removed by the user using the following steps.
Using the NCache Management Center
Launch the NCache Management Center by browsing to http://localhost:8251 or
<server-ip>:8251.In the left navigation bar, click on Clustered Caches or Local Caches, based on the cache to which the query index will be added. Against the cache name, click on View Details.
This opens up the detailed configuration page for the cache. Go to the Advanced Settings tab and click on Query Indexes in the left bar.
This opens up the Query Indexes page which shows existing classes for query indexes.
Select the classes to remove and click on Remove.
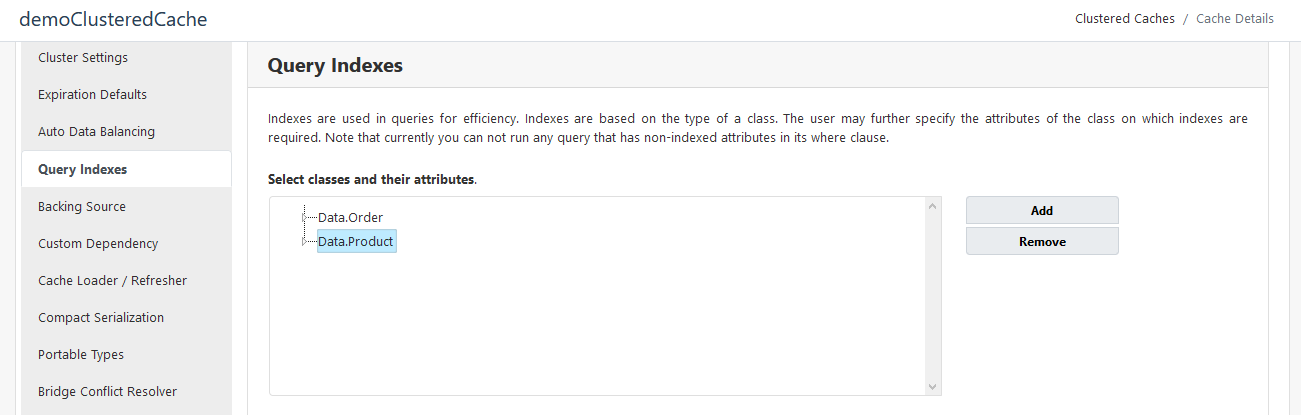
- Click on Save Changes to apply this configuration to the cache.
Using PowerShell
- The Remove QueryIndex cmdlet enables the user to remove pre-defined query indexes for the objects to be added to the cache. The following command removes query indexing for the class Product from the cache demoCache.
Remove-QueryIndex -CacheName demoCache -Class Alachisoft.NCache.Sample.Data.Product
- This command removes query indexes for Customer class on server 20.200.20.11.
Remove-QueryIndex -CacheName demoCache -Class Data.Customer/
                  -AttributesList "CustomerID'$'FirstName" -Server 20.200.20.11
- This command removes query indexes for the class Customer using security credentials.
Remove-QueryIndex -CacheName demoCache -Class Data.Customer -Credentials (Get-Credential john_smith)