Remove Cache Server Node
A pre-existing server node can be simply removed from the cache it is a part of, using the NCache Management Center and PowerShell, etc., as detailed below.
Using the NCache Management Center
Launch the NCache Management Center by browsing to http://localhost:8251 or
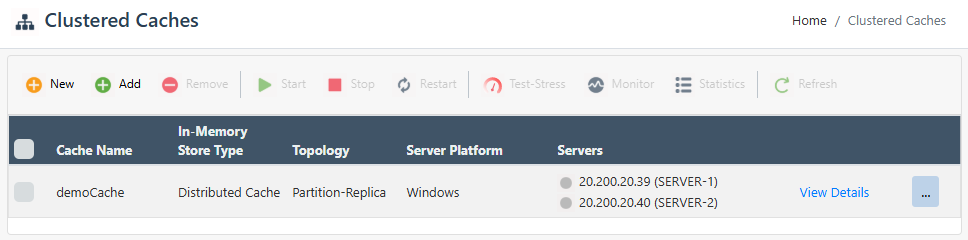
<server-ip>:8251.In the left navigation bar, click on Clustered Caches. This opens up a new page. It shows any existing local or clustered caches and additional details like Server and Server Platform.
Against the cache name, click on View Details.
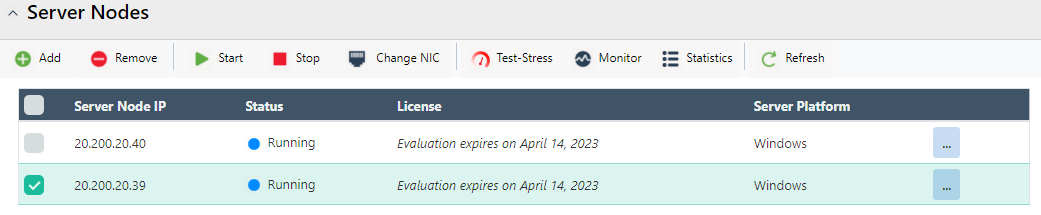
This opens the detailed configuration page for the cache. The Server Nodes tab displays a list and status of the existing server nodes of the cache.
Choose the node to be removed. Click on the
 button. A success notification will be displayed.
Note
You might get prompted with a dialog box upon these changes, asking whether to reload or overwrite the cache config file.
- The server node is removed from the Server Nodes list.
Using PowerShell
- The Remove Node cmdlet enables the user to remove a particular node from the existing cache on a server or a specified node from the provided clustered cache. The following command removes node 20.200.20.11 from demoCache.
Remove-Node -CacheName demoCache -Server 20.200.20.11
- The following command removes the specified server node from the cache named demoCache from the local server by gracefully stopping it.
Remove-Node -CacheName demoCache -Server 20.200.20.11 -GracefulStop
- The following command removes the specified server node from the cache named demoCache using security credentials.
Remove-Node -CacheName demoCache -Server 20.200.20.11 -Credentials(Get-Credential john_smith)
Forcefully Remove Unavailable Server Node
If a server node becomes unavailable and cannot be recovered or contacted by the cluster, you can forcefully remove it from the cache cluster. This is useful when the node has been permanently shut down, deleted, or is no longer part of the deployment. Forceful removal cleans up the cluster membership so that NCache no longer treats the unavailable node as part of the cache.
Using the NCache Management Center
You can forcefully remove an unavailable server node from the cluster using the NCache Management Center as follows:
Launch the NCache Management Center by browsing to http://localhost:8251 or
<server-ip>:8251.In the left navigation bar, click on Clustered Caches. This opens up a new page. It shows any existing local or clustered caches and additional details like Server and Server Platform.
Against the cache name, click on View Details.
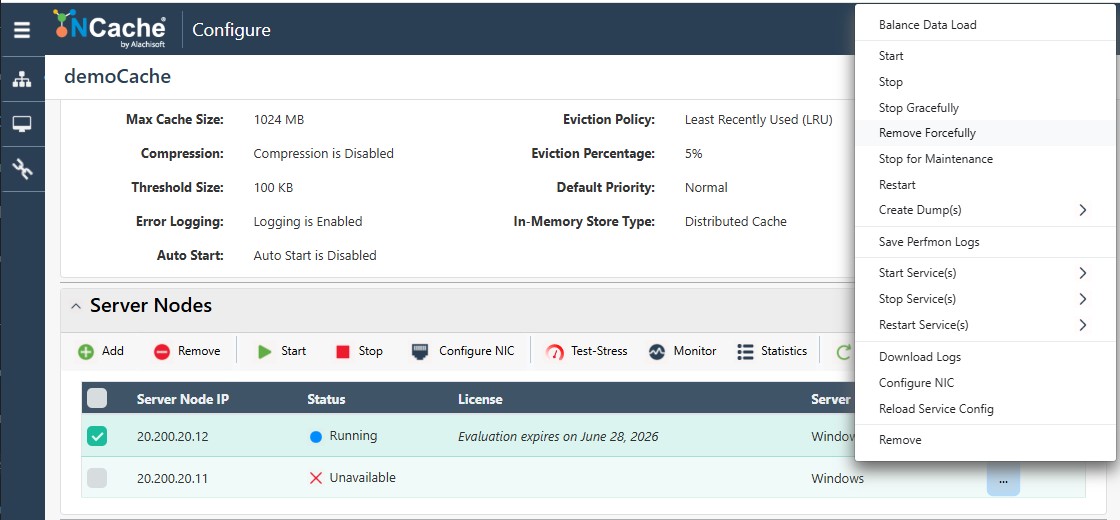
On the cache details page, go to the Server Nodes tab. This tab displays the configured server nodes and their current status.
Select the Unavailable Server Node that you want to remove.
Click "..." against the selected node, and then click Forcefully Remove.
Using PowerShell
- The following command removes node 20.200.20.11 from the demoCache even if the server is unreachable.
Remove-Node -CacheName demoCache -Server 20.200.20.11 -RemoveIfUnavailable -ExistingServer 20.200.20.12
Manually Editing NCache Configuration
You can also manually edit the NCache configuration to remove a server node from the cluster.
Note
The following steps apply to both NCache Enterprise and NCache Open Source. However, NCache Open Source only supports Replicated Caches and allows a maximum of 3 nodes in a Replicated cache cluster.
Remove a Node from a Cache Cluster
You can remove a server node from a cache cluster by updating the <cache-deployment> section in the config.ncconf file. To remove a server node from a cache cluster, follow these steps:
Open the config.ncconf file with administrative privileges on any existing cache server node, such as node-1
20.200.20.12, node-220.200.20.11, or node-320.200.20.13.<cache-config cache-name="demoCache" alias="" config-id="44fb997a-f6a7-433b-9439-7ef9de9f47c7" config-version="0" store-type="distributed-cache"> <cache-settings inproc="False" data-format="Serialized" serialization="Json"> <logging enable-logs="True" trace-errors="True" trace-notices="False" trace-warnings="False" trace-debug="False" log-path=""/> <performance-counters enable-counters="True" snmp-port="0"/> <cleanup interval="15sec"/> <storage type="heap" cache-size="1024mb"/> <eviction-policy enabled-eviction="True" default-priority="normal" policy="lru" eviction-ratio="5%"/> <cache-topology topology="partitioned-replica"> <cluster-settings operation-timeout="60sec" stats-repl-interval="60sec" use-heart-beat="False"> <cluster-connection-settings cluster-port="7802" port-range="2" connection-retries="2" connection-retry-interval="2secs" join_retry_count="24" join_retry_timeout="5"/> </cluster-settings> </cache-topology> <client-death-detection enable="False" grace-interval="60sec"/> </cache-settings> <cache-deployment deployment-version="0"> <servers> <server-node ip="20.200.20.12"/> <server-node ip="20.200.20.11"/> <server-node ip="20.200.20.13"/> </servers> </cache-deployment> </cache-config>In the
<cache-deployment>section of the cache named demoCache, remove the<server-node>entry for the node that you want to remove. For example, to remove node20.200.20.13, update the<cache-deployment>section as follows:<cache-deployment deployment-version="0"> <servers> <server-node ip="20.200.20.12"/> <server-node ip="20.200.20.11"/> </servers> </cache-deployment>Save the updated config.ncconf file.
Copy the updated
<cache-deployment>block to the config.ncconf file on all remaining cache server nodes.Restart the NCache Service on every remaining node in the cluster.
Restart-Service -Name NCacheSvcVerify that the node has been removed successfully by executing the following PowerShell cmdlet:
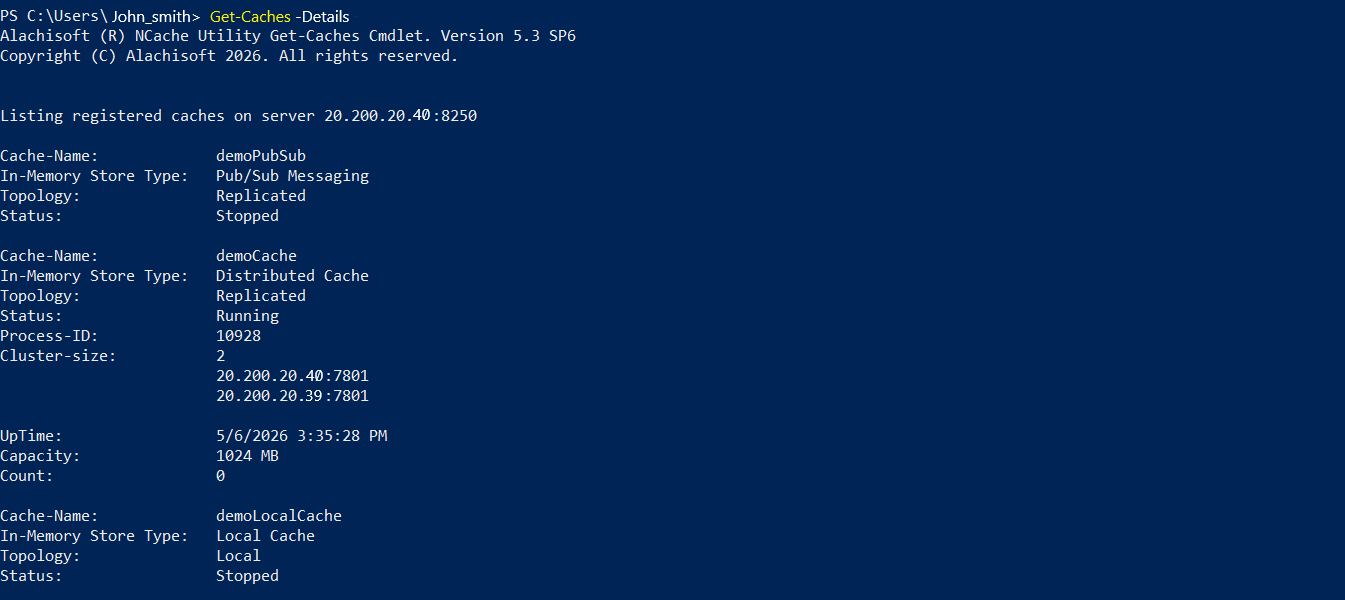
Get-Caches -DetailOnce the command executes successfully, the removed node no longer appears in the cache cluster details.