Configure Custom Dependency [Deprecated]
To configure Custom Dependency from the NCache Management Center, you need to provide the required provider details. Follow the steps below to configure Custom Dependency.
Important
For .NET, before deploying your .dll files, ensure you have the appropriate .NET Version installed as discussed in the NCache Installation Guide.
Using the NCache Management Center
Launch the NCache Management Center by browsing to http://localhost:8251 or
<server-ip>:8251.In the left navigation bar, click on Clustered Caches or Local Caches based on the cache to configure. Make sure that the cache is stopped.

Against the required cache name, click on View Details.
This opens the detailed configuration page for the cache. Go to the Advanced Settings tab and click on Custom Dependency.
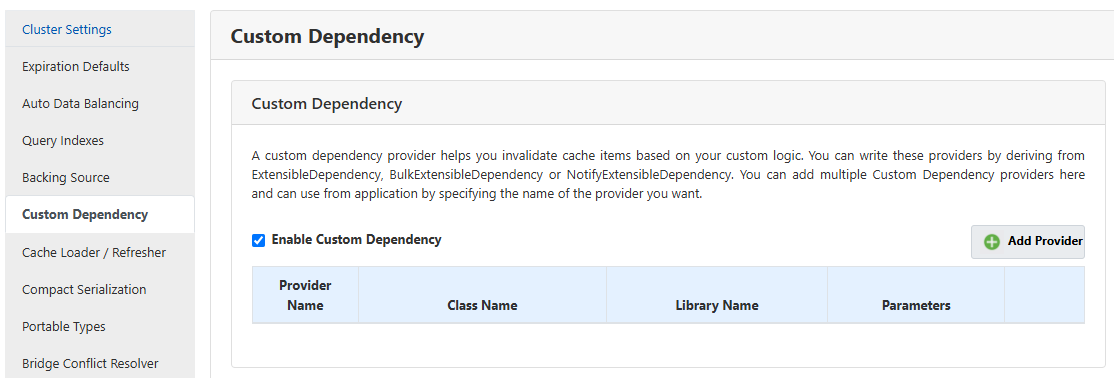
Check the Enable Custom Dependency box and click on the Add Provider button.

This opens the Add Custom Dependency Provider window. Here, enter the provider name in the Provider Name text box.
Click on the Browse button to select the DLL implementing the Custom Dependency Provider interface. Select the class name from the dropdown list.

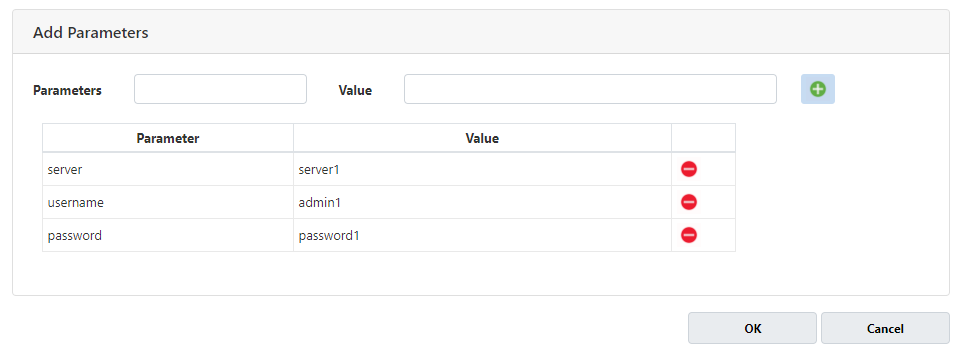
- You can also add parameters and their values to your custom dependency provider in the Parameters field. This step is optional.

Click the OK button.
Your added provider will be listed under Custom Dependency in the Custom Dependency tab.

- Now you need to deploy the custom dependency provider library along with its dependent assemblies, if there are any. For this, click on the Deploy Custom Dependency Provider button on the bottom-left of the Custom Dependency tag.

From the pop-up window, Browse and select the required assemblies. Click Open to deploy these assemblies. You will receive a success notification.
After applying all the changes, click on Save Changes.
Configure via XML (config.ncconf)
You can configure Custom Dependency through config.ncconf. Add the following tags in your config.ncconf:
<custom-dependency enable-custom-dependency="True">
    <provider provider-name="MyCustomDependencyProvider" assembly-name="CustomDependencyImpl, Version=1.0.0.0, Culture=neutral, PublicKeyToken=null" class-name="Alachisoft.NCache.Samples.Providers.CustomDependencyProvider" full-name="CustomDependencyImpl.dll" default-provider="False">
        <parameters name="server" value="server1"/>
        <parameters name="admin" value="admin1"/>
        <parameters name="password" value="password1"/>
    </provider>
</custom-dependency>
Note
Edit the service config tags to customize Custom Dependency, shown in the Custom Dependency section of NCache Service config.
Configure via Command Line (PowerShell)
You can also configure Custom Dependency using Command Line Tools, as discussed below:
Configure Custom Dependency
The Add-CustomDependency cmdlet configures custom dependency providers for the specified cache. The following command enables the Custom Dependency Provider named MyCustomDependencyProvider against cache demoCache on server 20.200.20.40.
Add-CustomDependency -CacheName demoCache -AssemblyPath C:\Provider.dll -Class CustomDependencyProvider -ProviderName MyCustomDependencyProvider -Server 20.200.20.40
Remove Custom Dependency
The Remove CustomDependency cmdlet removes the pre-configured custom dependency provider from the cache or the specified server. The following command removes the pre-configured custom dependency provider named MyCustomDependencyProvider from demoCache.
See Also
Deploy Providers
Sync Cache Using Bulk Extensible Dependency
Sync Cache Using Notification Extensible Dependency