VPC Peering for AWS
VPC Peering is a networking connection between two Virtual Private Clouds (VPCs) dedicated to your AWS account that allows traffic to flow privately between them using private IP addresses, without needing a public gateway, VPN, or internet connection. You can create a VPC peering connection between your own VPC and the VPC of the NCache environment deployed in your subscription.
Follow the steps below to establish VPC Peering:
- From the dashboard, click on Create Environment in the Environment Details section.
- Provide Environment Name, Environment Type, Region, Availability Zone, Server Plan, NCache Version, Server(s), NCache CIDR, and Application CIDRs in the respective fields. Choose VPC Peering as the connection type. Keep in mind that AWS assigns Availability Zone names (like us-west-2a) randomly per account. Therefore, ensure that the Availability Zone ID in your NCache Cloud environment matches the corresponding ID displayed in your own AWS account, not just the name. This ensures that there are no latency or peering issues.

Note
You can find the Availability Zone ID in the EC2 Console dashboard by going to EC2 > Instances, selecting a running instance, and checking the Details section. Both the Availability Zone name (e.g., us-west-2a) and its corresponding Zone ID (e.g., usw2-az1) will be listed.
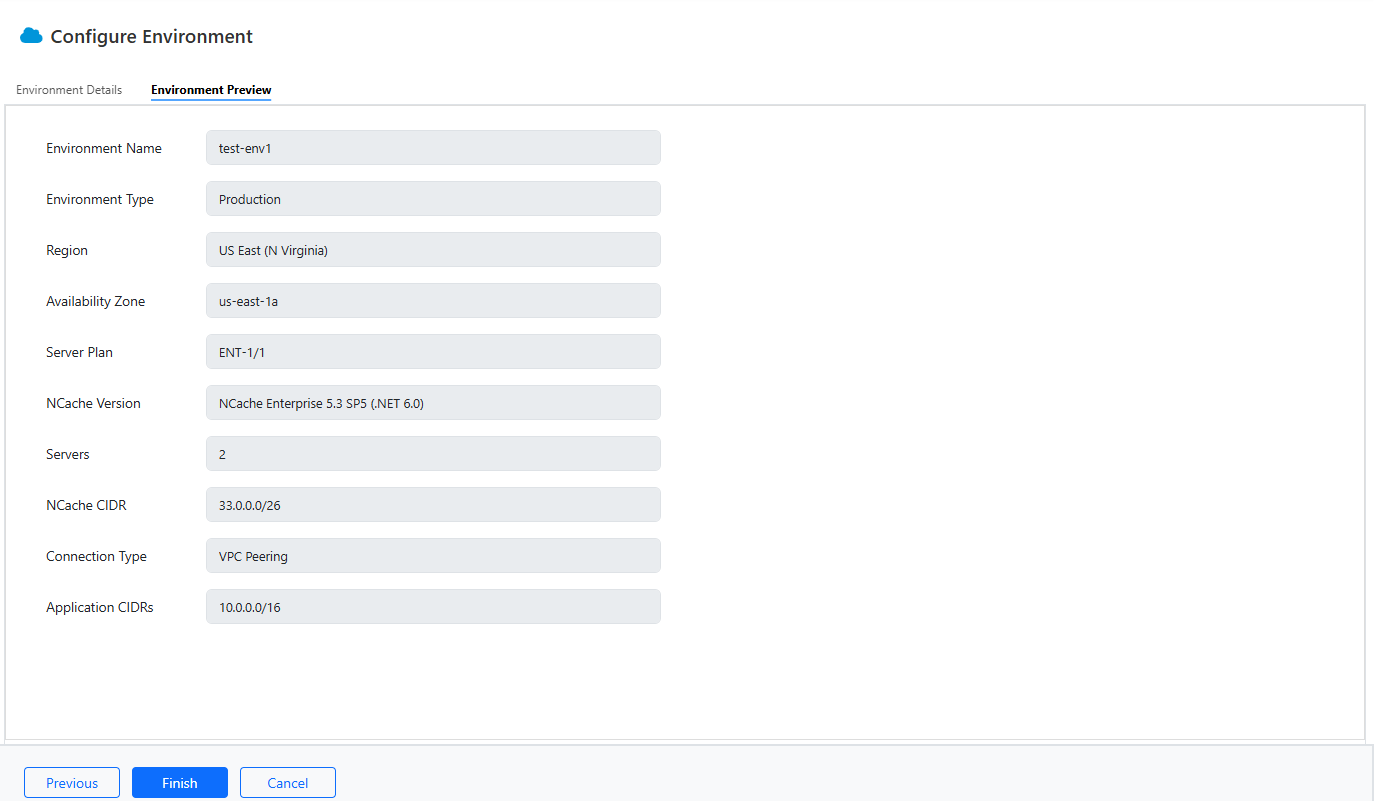
- You can preview your environment details as shown below. Click Finish once reviewed.
An Environment Creation Prompt appears asking you to confirm or cancel your environment creation.
Upon confirming, you will see another prompt stating your environment deployment is in progress.
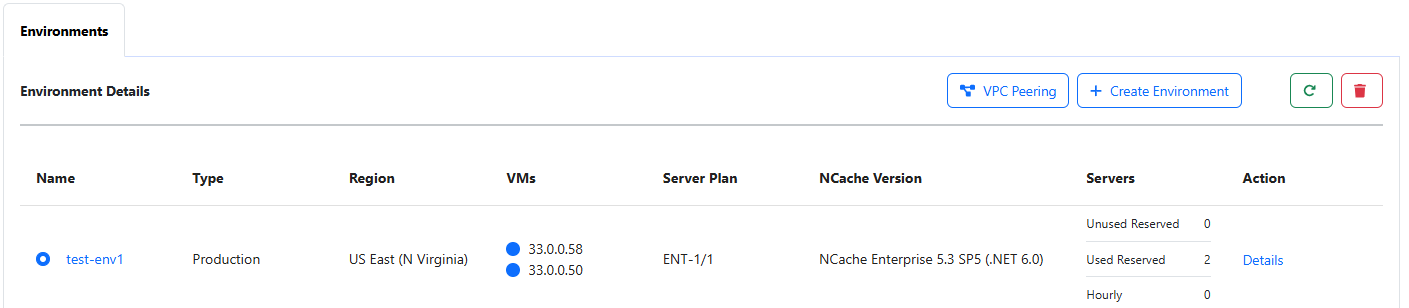
You'll be able to see your newly created environment on the Dashboard in the Environments tab.
Establish VPC Peering
Follow the steps below to establish VPC Peering:
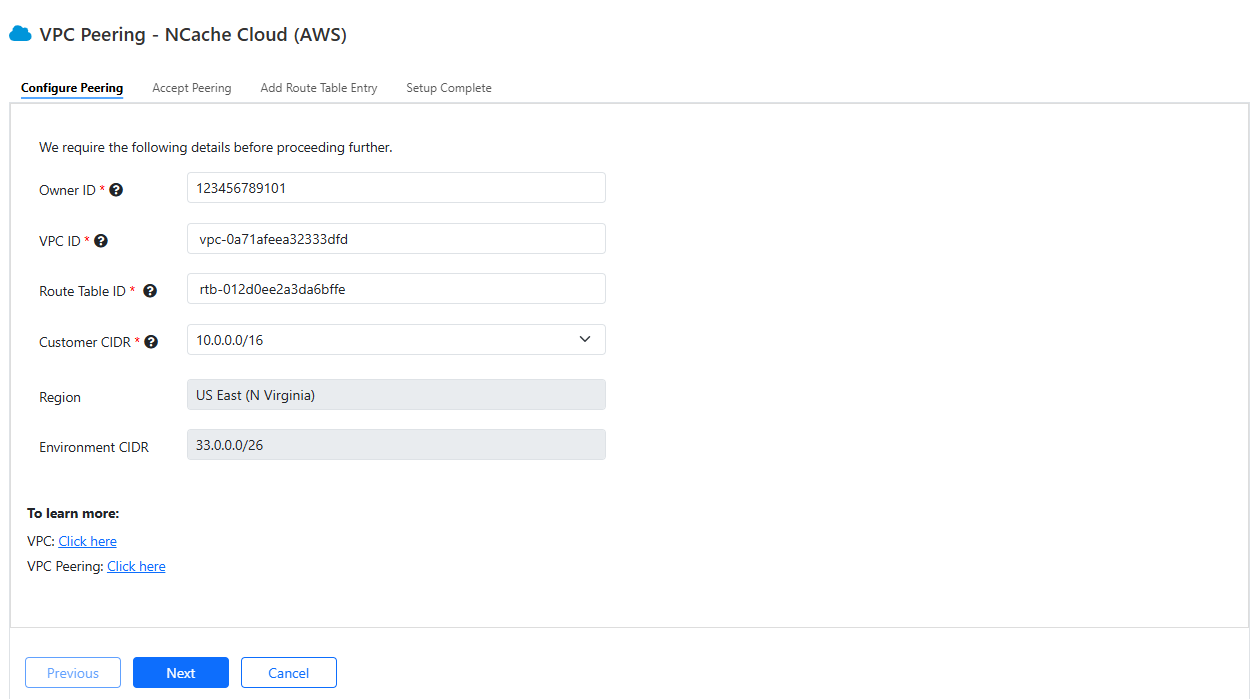
Click on VPC Peering in the environment details section on the dashboard.
First, you need to configure peering by providing the OwnerID (your AWS Account ID), VPC ID (The VPC with which you want to peer), Route Table ID, and Customer CIDR. Region and Environment CIDR are preselected for you based on your environment. Click Next.
Note
You can find your AWS Owner ID under My Account in the AWS Console. The VPC ID and Route Table ID are available in the VPC Dashboard under Your VPCs and Route Tables, respectively.
Once the peering connection is created, you must manually accept the request. You can do this in one of two ways:
- Using the script: Copy the provided script and run it in the terminal of the AWS Management Console in the same region.
- Through the Console: Go to VPC → Peering Connections, select the Request, click Actions → Accept Request, and confirm when prompted.
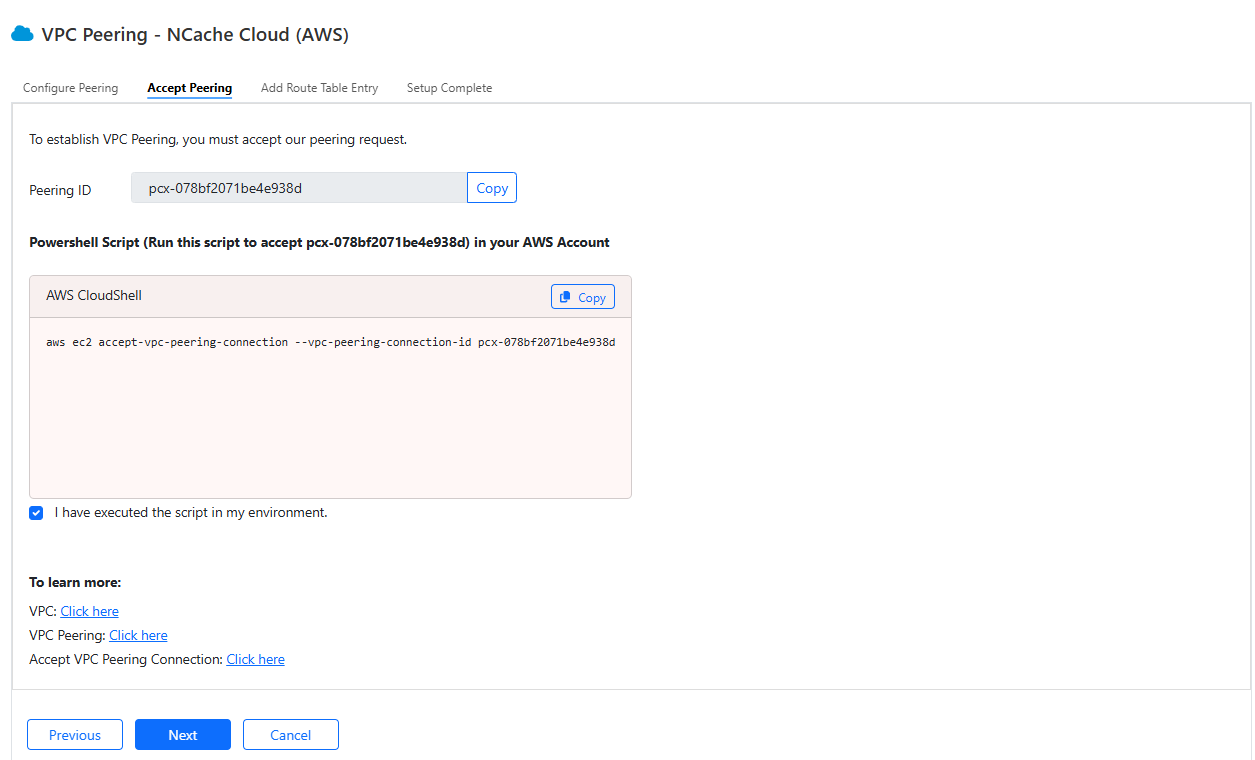
You will be able to see a success message that your VPC connection has been established.
Select the checkbox: "I have exceuted the script in my environment". Click Next.
Next, you need to add a route table entry to allow traffic between the peered VPC. Copy the script and execute it in the AWS terminal.
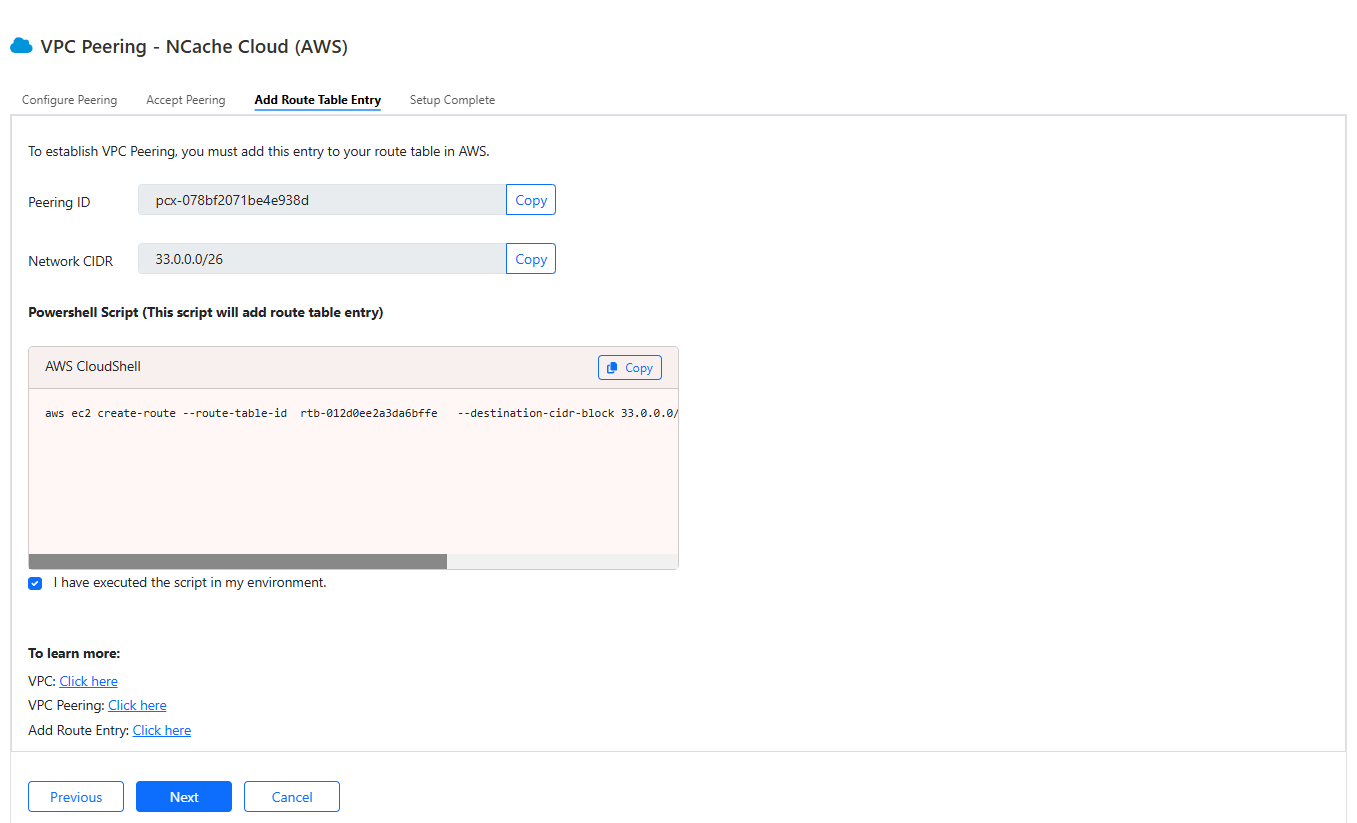
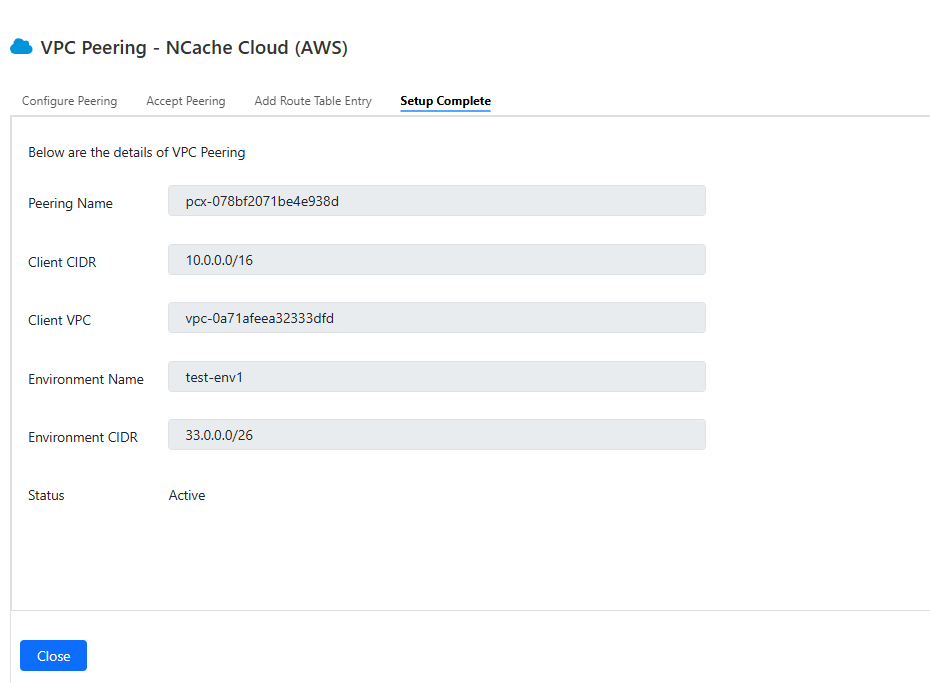
- Select the checkbox: “I have executed script in my environment” and click Next. You can preview the details in the Setup Complete tab.
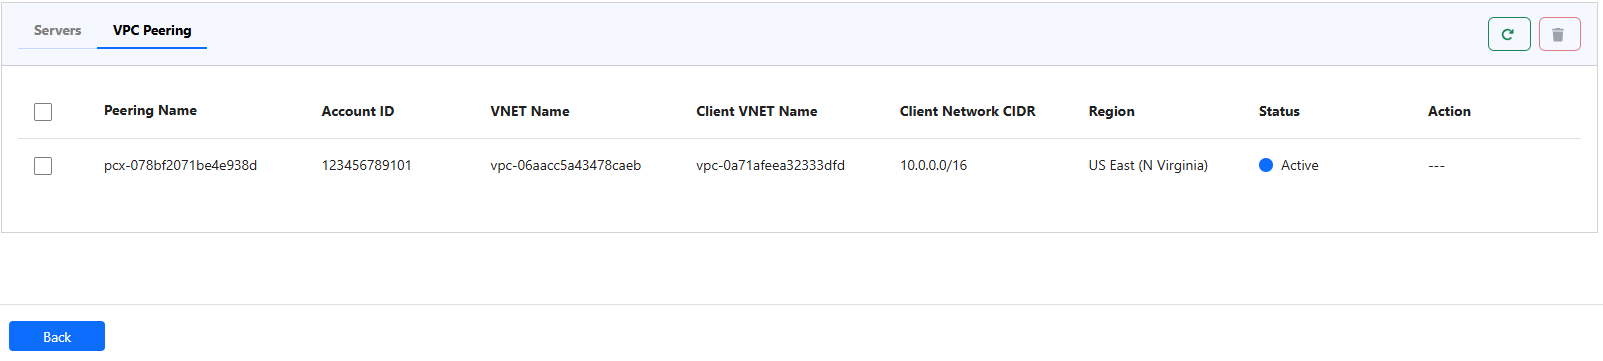
- You can view the details of your VPC Peering on the dashboard in the Environments tab.

Your VPC's subnet is now peered with our subnet, creating a virtually shared network space. This means that the VMs (virtual machines) within that subnet can now communicate directly with our deployed servers, as if they were on the same network.
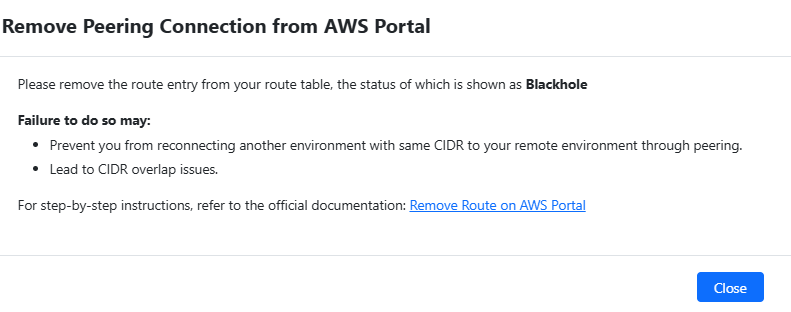
Delete Peering
- You can delete your peering connection when you no longer require it by selecting your Peering and clicking on the Delete icon.
A prompt appears asking for confirmation.
Another prompt will appear, instructing you to remove the peering connection from your AWS Portal. To do this, you must manually update the route tables. This step ensures that you cannot reconnect another environment with the same CIDR to your remote environment via peering, preventing potential network conflicts.
To learn more about how to manage your environment, please see Environment Management page.