Connect and Manage Deployment
After successfully creating the AWS CloudFormation stack, AWS deploys the required Amazon EC2 instances for the NCache cluster as part of the configured Auto Scaling Group (ASG) environment. The next step is to connect to one of the deployed Windows instances and access the NCache Management Center to manage and monitor your deployed NCache cluster.
The following steps explain how to locate the deployed instance and access your NCache instance.
Step 1: Access Auto Scaling Group
The Auto Scaling Group manages the deployed Amazon EC2 instances and maintains the configured number of NCache server nodes for the environment. Follow the steps below to access the deployed Auto Scaling Group:
Under the Resources tab on your created stack page in AWS CloudFormation, locate the NCacheAutoScalingGroup resource and click its Physical ID.
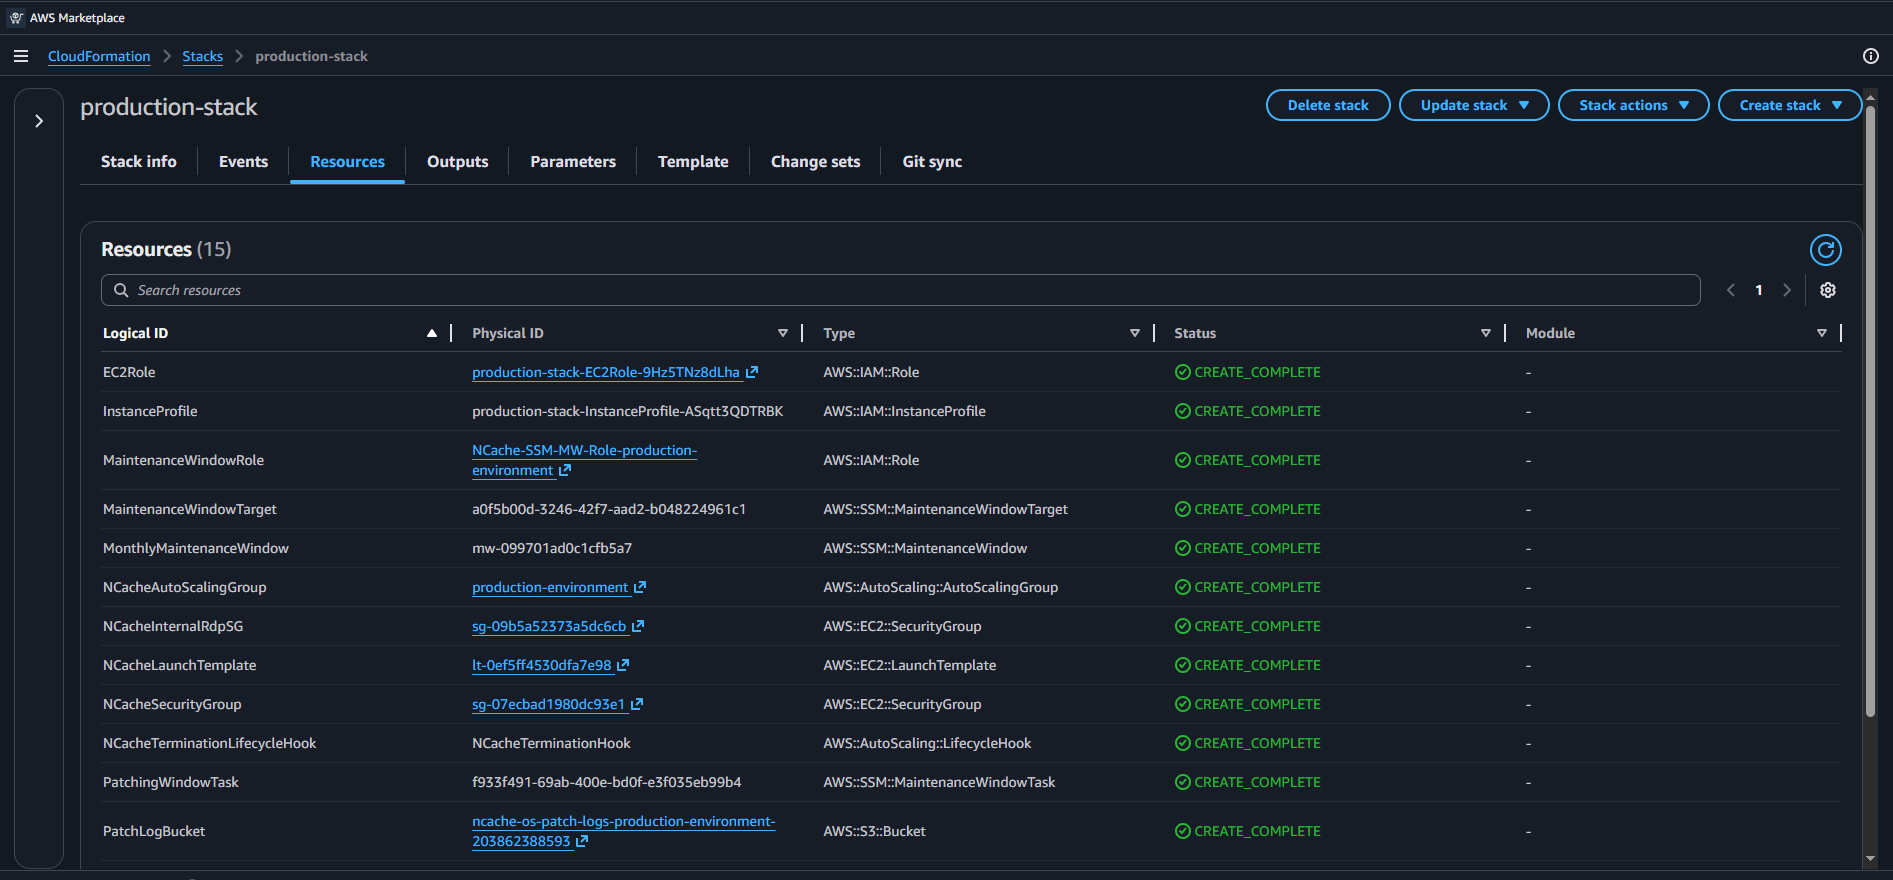
Clicking the Physical ID opens the corresponding Auto Scaling Group in the Amazon EC2 Console.
On the Auto Scaling Groups page, locate the group created as part of your deployment. This group uses the same environment name specified earlier during stack creation.
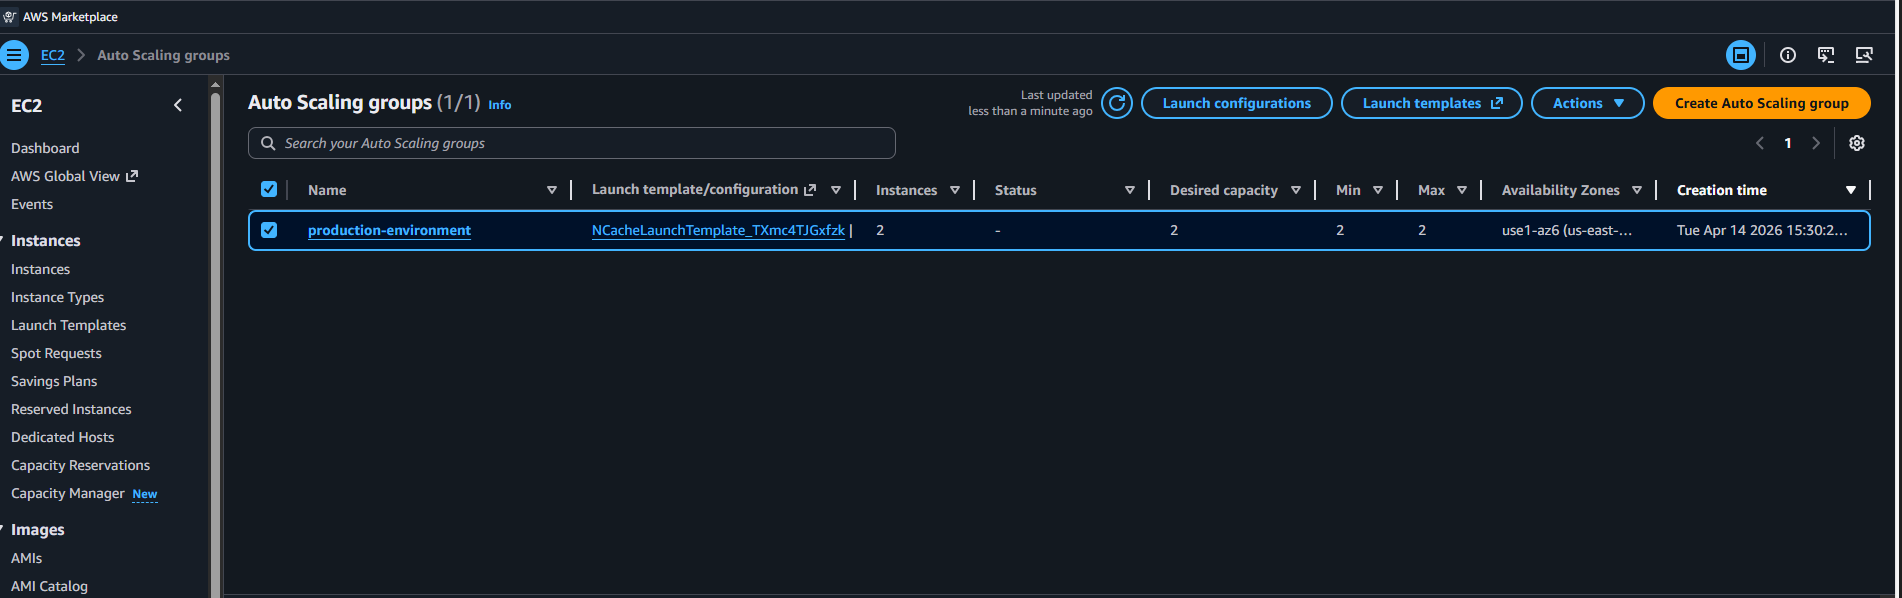
Step 2: Open Instance Details
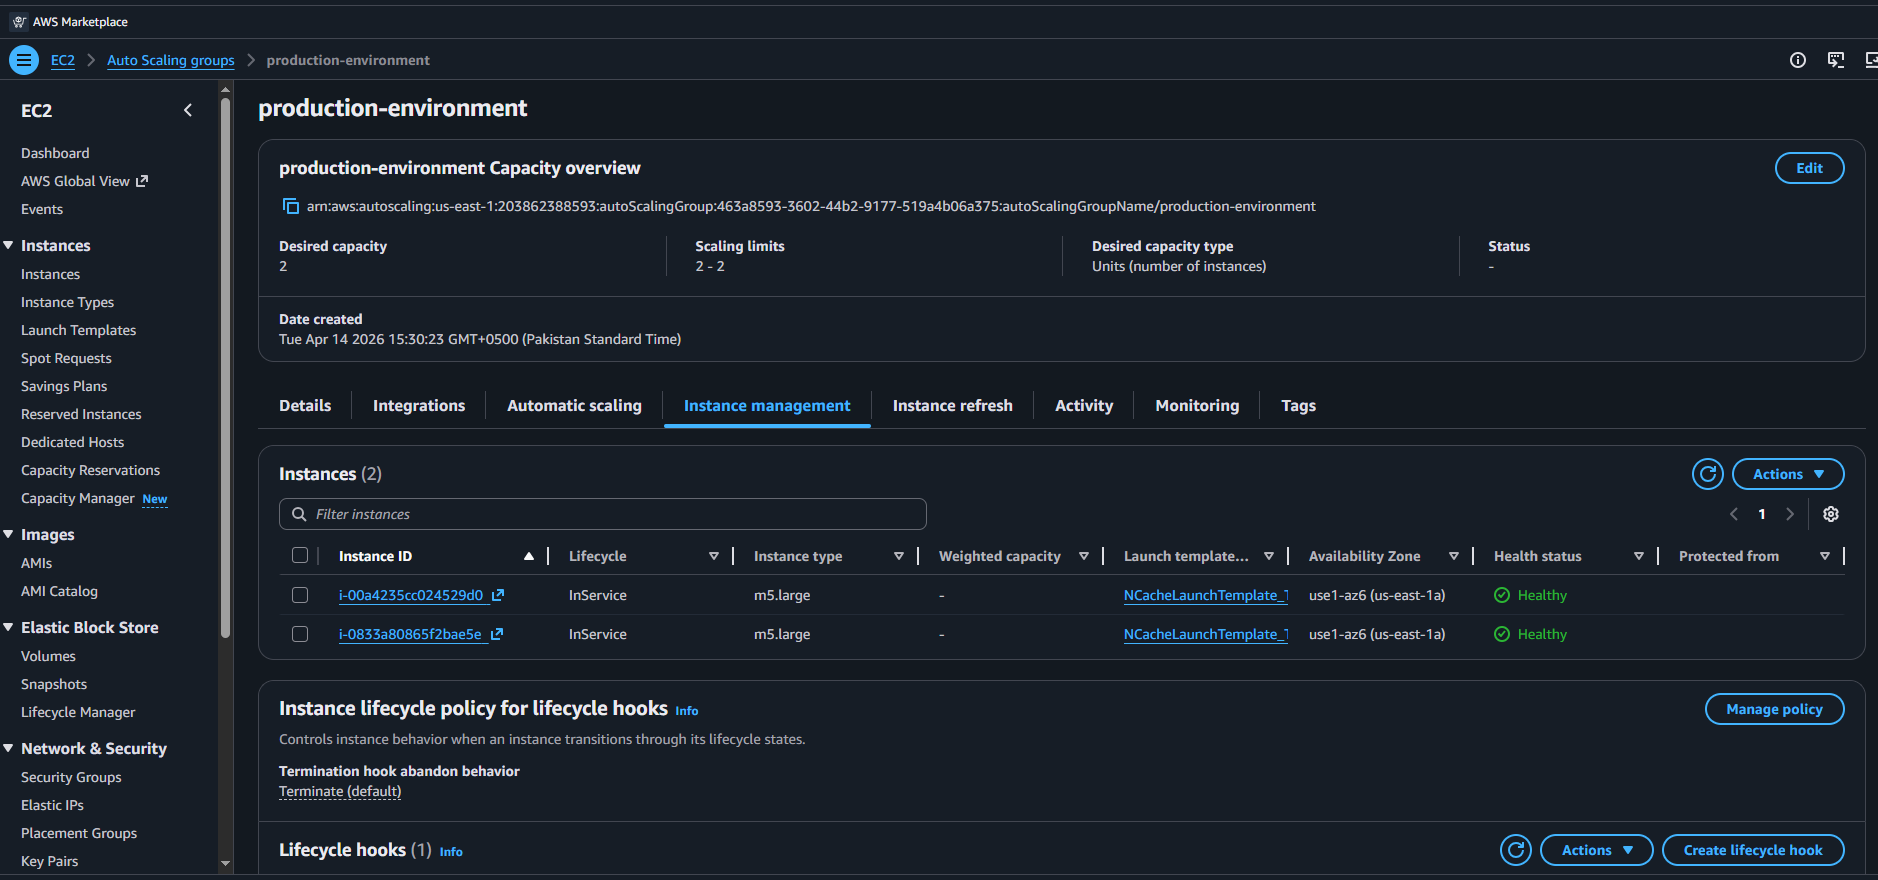
Upon clicking, the detailed page of the Auto Scaling Group will open. Navigate to the Instance management tab and from the list of instances, click on any Instance ID that you want to connect to.
This action opens the Instance summary page. This page provides detailed information about the deployed instance, including its current status, networking configuration, public and private IP addresses, DNS details, associated VPC and subnet, Auto Scaling Group association, storage configuration, and monitoring information. It also provides management options for connecting to and managing the deployed NCache server instance.
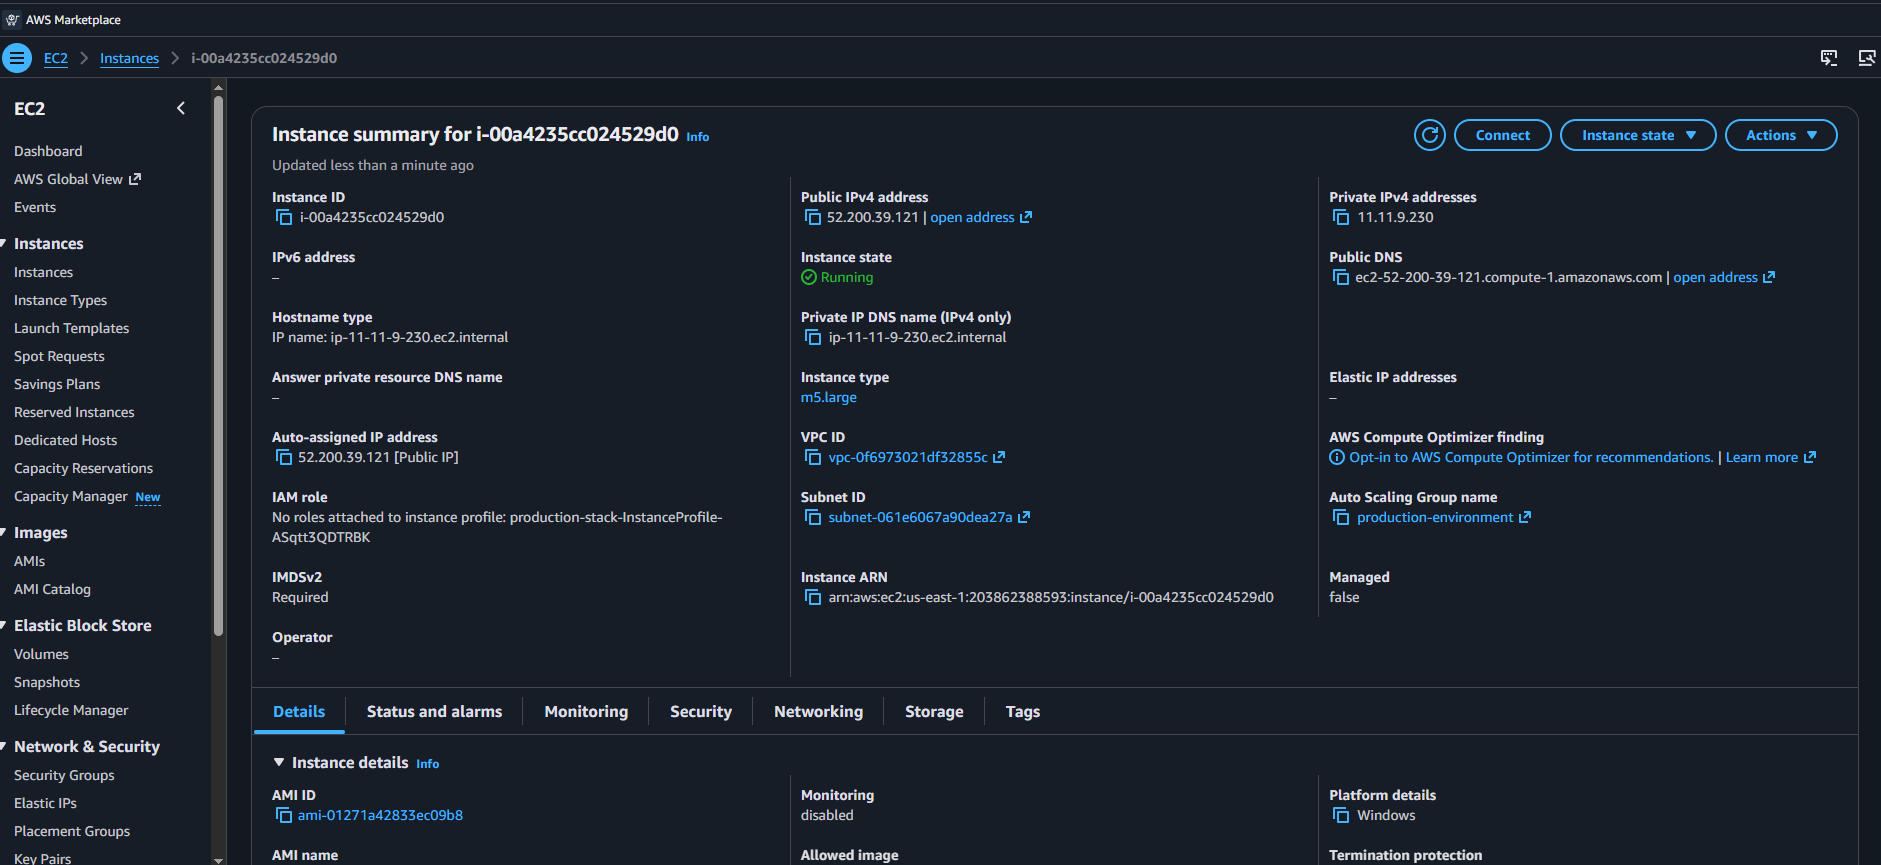
Step 3: Connect and Access NCache Management Center
After opening the Instance summary page, select the connection method based on the Assign Public IP to NCache Instances option that was configured under Environment Details during stack creation. If public IP access was selected, you can use either of the public IP options. If public IP access was not selected, access the instance through its private IP from within the same AWS VPC.
Note
Please note that enabling the Public IP only exposes administrative entry points; it does not open or grant access to the internal operational ports of NCache.
Option 1: Using Public IP with RDP
Establishing a Remote Desktop connection provides full access to the underlying Windows instance. This option allows you to connect to the Windows instance through Remote Desktop Protocol (RDP) and then open the NCache Management Center from inside the instance.
From the top-right corner of the instance page, click Connect.
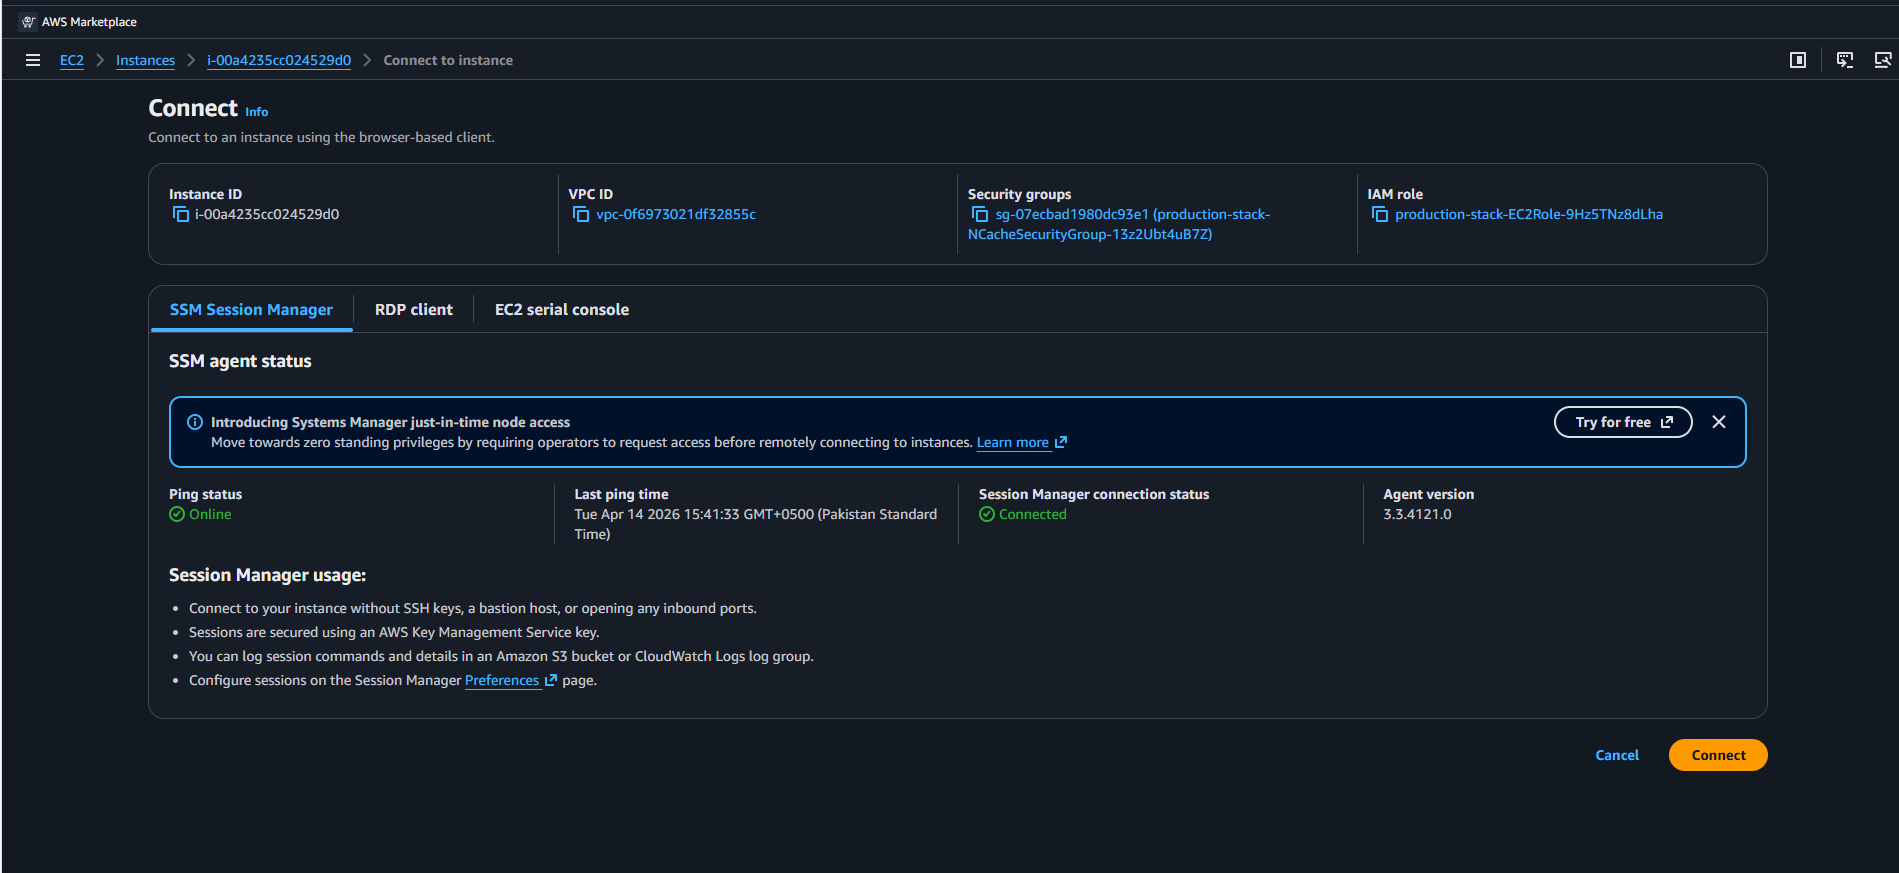
On the Connect page, navigate to the RDP client tab.
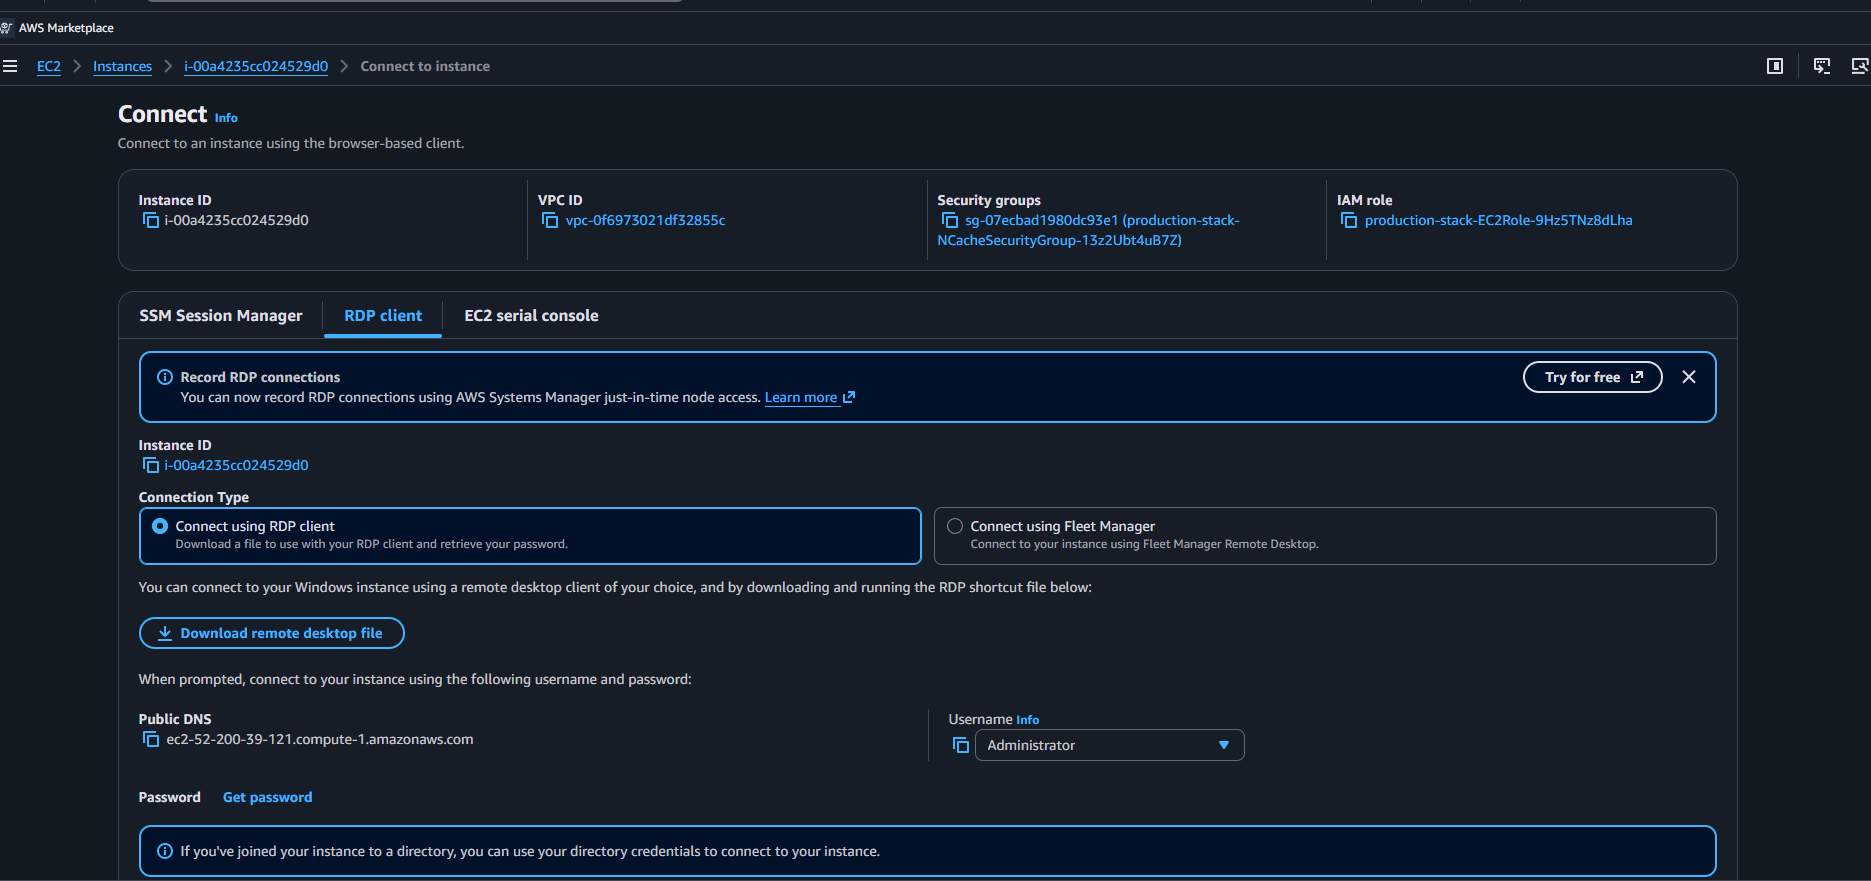
The RDP client tab provides details such as:
- Public DNS name of the instance
- Default Windows username
- Remote Desktop connection file download option
- Password retrieval option using the configured EC2 key pair
Scroll down to the bottom of the page and click Get password.
Retrieve Windows Password
After clicking Get password, the Get Windows password page will appear. Under Private key contents, paste the contents of your EC2 key pair.
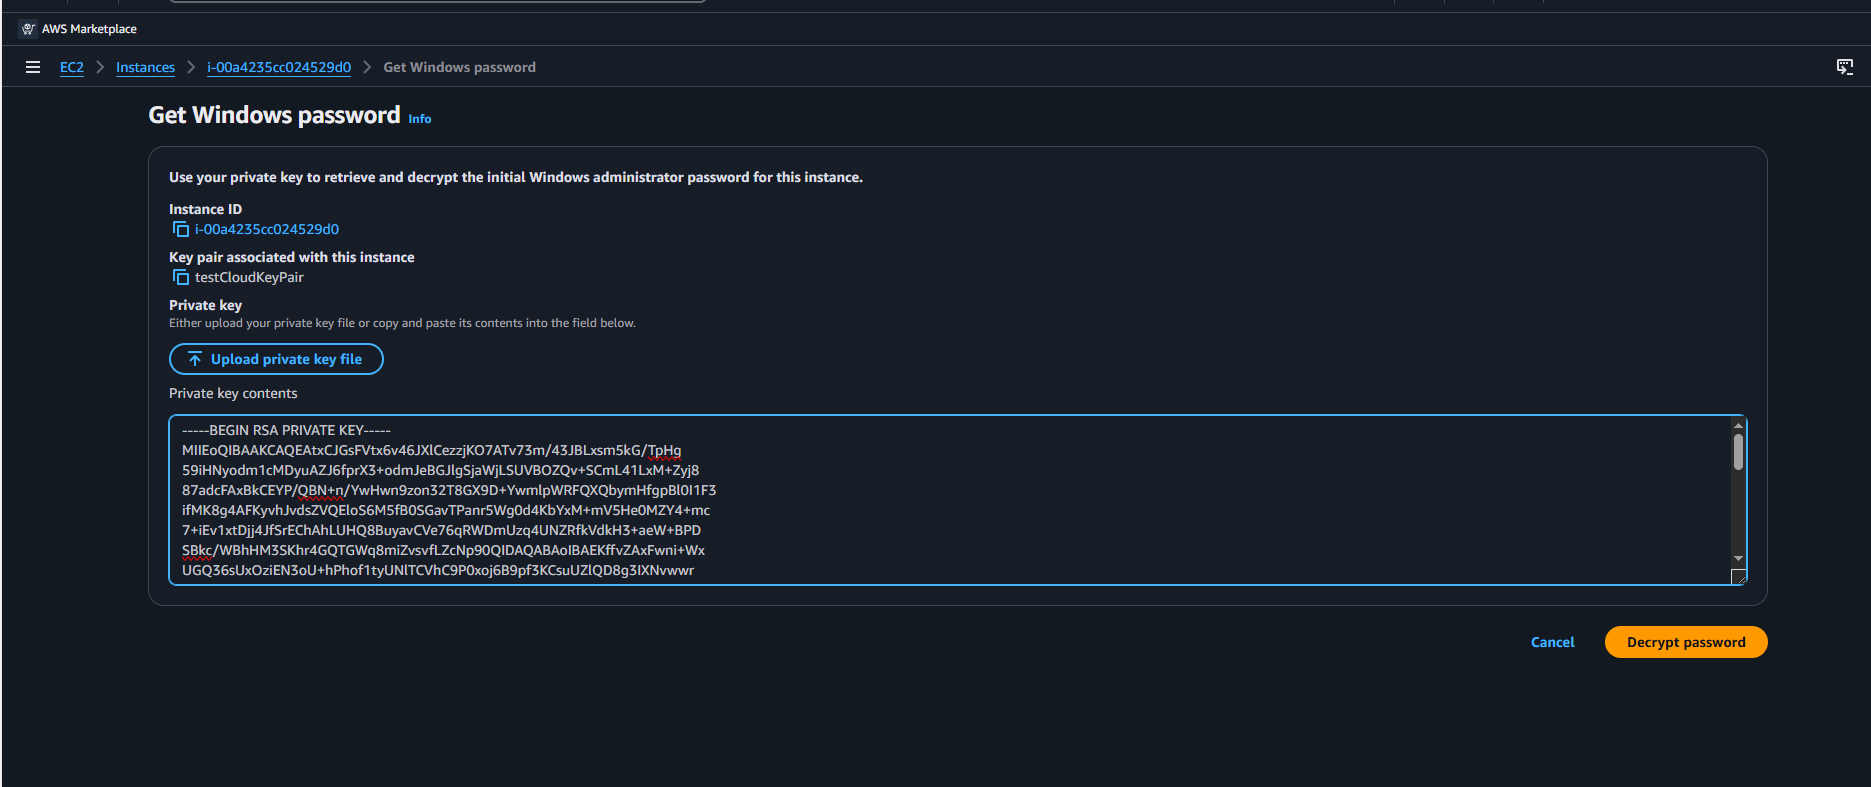
AWS uses the selected EC2 key pair to securely encrypt the Windows Administrator password during instance creation. Pasting the private key contents here allows AWS to decrypt and display the actual Windows password for the deployed instance.
Note
This key pair is the same one that was selected or created during the Specify stack details step. It is required to decrypt the Windows administrator password for the instance.
After pasting the key, click Decrypt password.
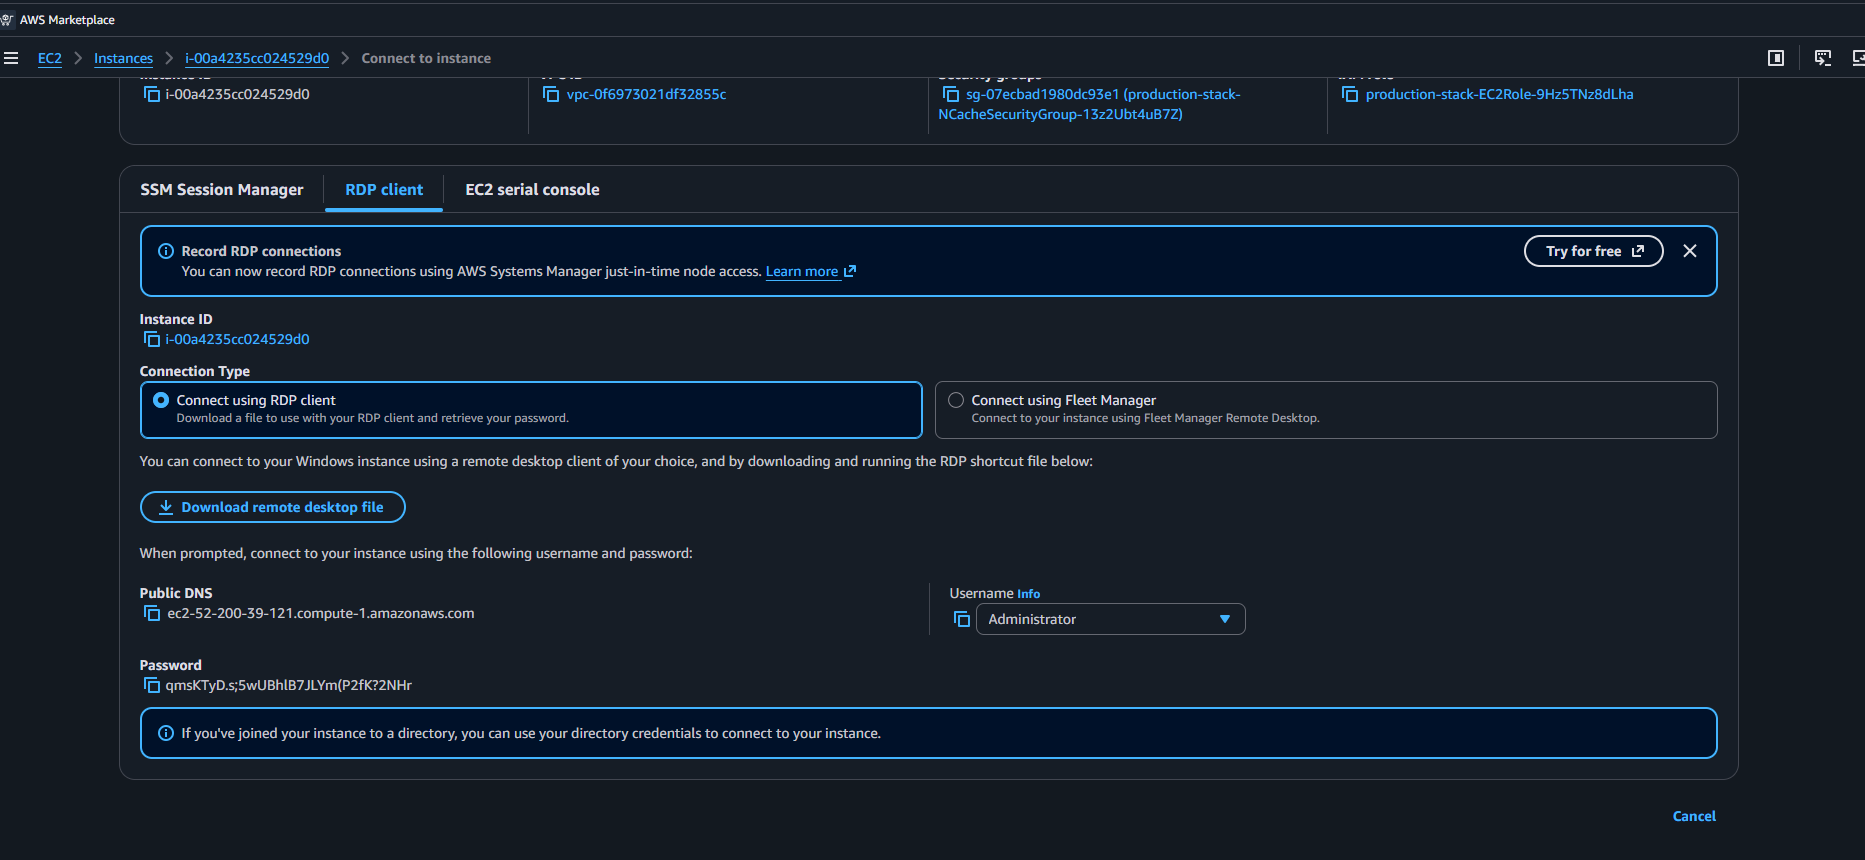
Upon decryption, the Windows password will be displayed. Copy this password for later use.
Connect via Remote Desktop
After copying the password, click Download remote desktop file to download the
.rdpfile.Open the downloaded file to launch the Remote Desktop Connection.
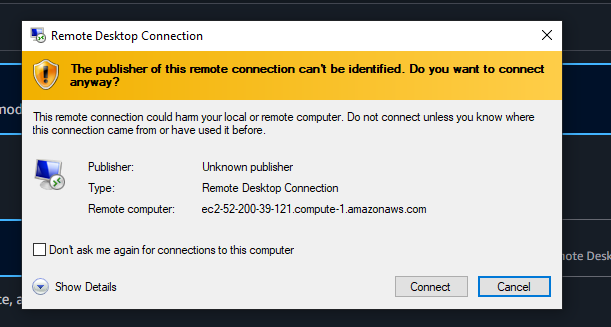
When prompted, enter the copied password to connect to the instance.
Once connected, open a web browser inside the instance and navigate to
http://localhost:8251.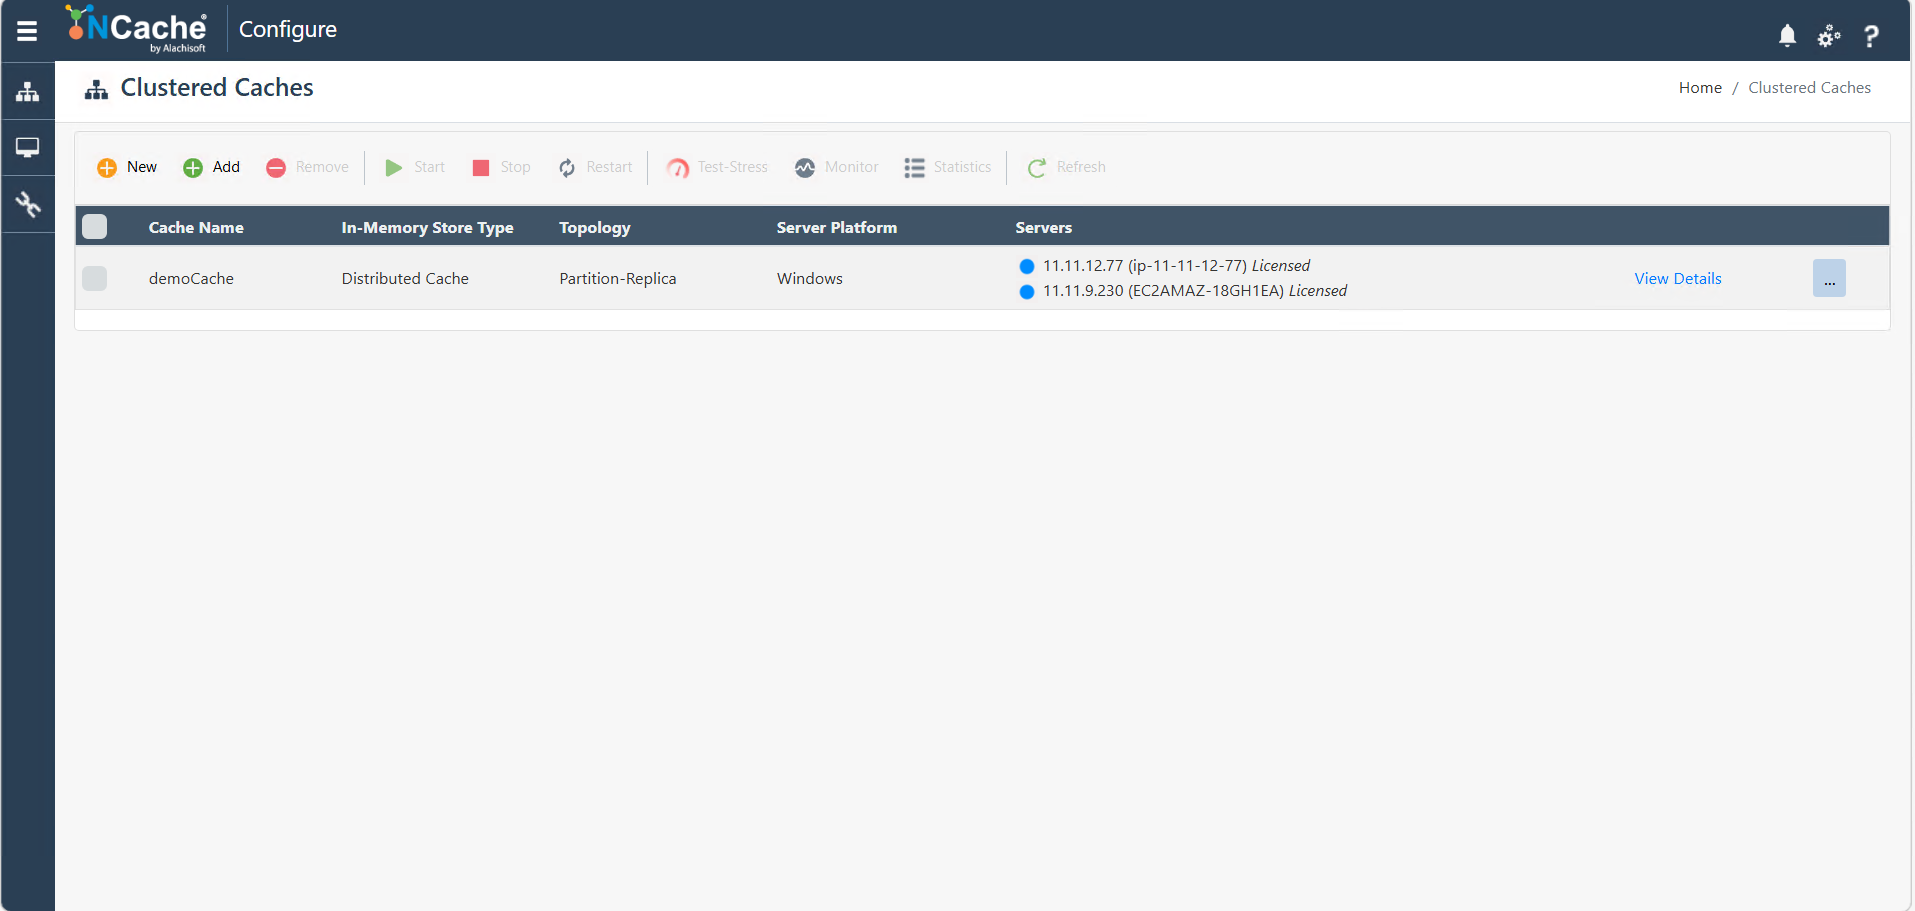
This opens the NCache Management Center, where you can view and manage your deployed cache cluster.
Option 2: Using Public IP with Management Port
This option allows you to access the NCache Management Center directly from your local browser by using the public IP address of the selected instance with the NCache management port. It is useful for quick browser-based management when public IP access is enabled for the deployment.
On the Instance summary page, copy the public IP address of the selected instance.
Open a browser on your local machine and enter the public IP address with the management port:
http://<Public_IP>:8251. This opens the NCache Management Center directly in your browser.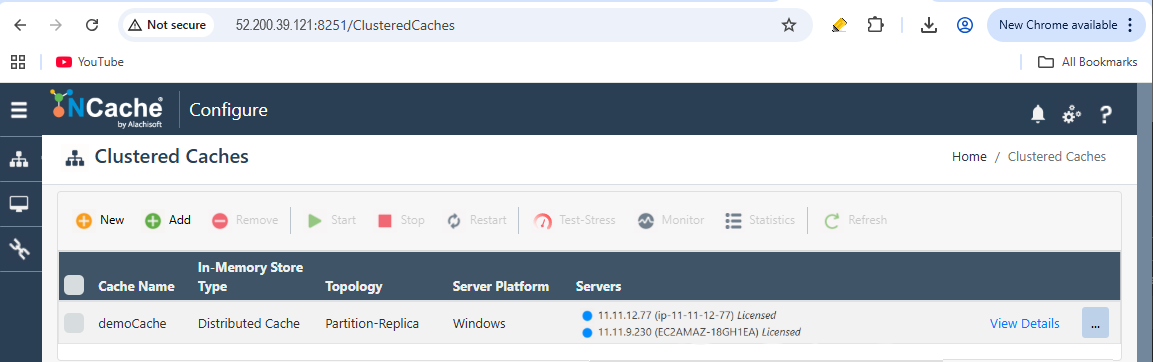
To secure and encrypt your administrative network traffic over the public internet, you can enable HTTPS by following the steps outlined in Configure HTTPS Security page.
Option 3: Using Private IP
Use this management option for secure enterprise environments where public IP access is restricted or disabled. It allows you to access the NCache Management Center by using the private IP address of the selected instance from a machine that is already inside the same AWS VPC or connected private network. Private IP addresses are not directly reachable from your local machine over the internet. Therefore, to access the NCache Management Center through a private IP address, you must first connect to a management machine, jump server, or application server that can reach the NCache instances inside the same AWS VPC.
On the Instance summary page, copy the private IP address of the selected NCache instance.
Log in to a management machine, jump server, or application server that is already deployed inside the same AWS VPC where the NCache cluster is running. From that internal machine, open a web browser and navigate to the private IP address of the selected NCache instance with the management port:
http://<Private_IP>:8251. This opens the NCache Management Center from inside the private network.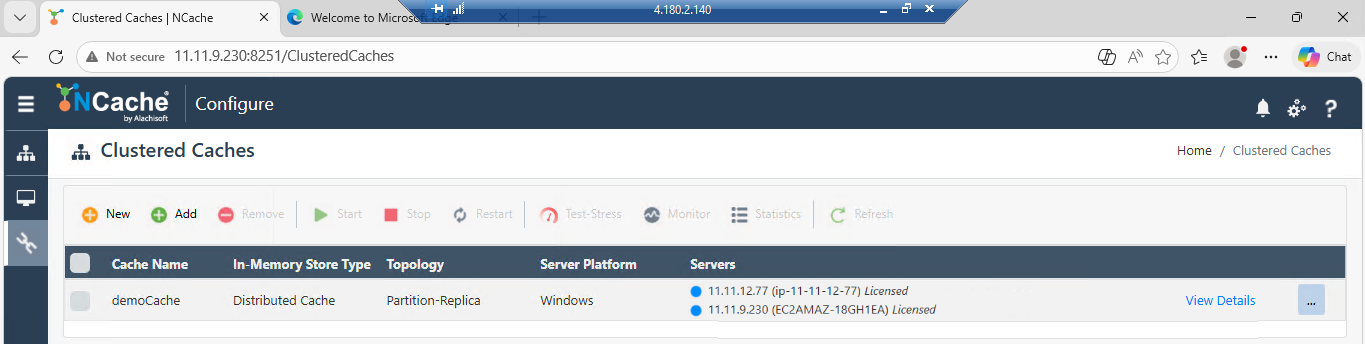
After accessing the NCache Management Center, you can proceed with cache configuration and management operations. For detailed instructions on performing these operations, refer to the Administrator's Guide.
Special Considerations for AWS ASG
Understand the following operational boundaries and architectural requirements to ensure the security and predictability of your NCache deployment on AWS:
Client Communication Restriction
Public IP addresses are intended for cache management operations only, such as RDP access or browser-based access to the NCache Management Center. Public IPs are not intended for client application communication with the NCache cluster. Application clients should reside within the same AWS VPC, a peered VPC, or a connected private network so they can communicate with the NCache cluster over private IP addresses.ASG Runtime Scalability
In an NCache Auto Scaling Group (ASG) deployment, all configured caches must run uniformly on all cluster nodes. When you add a new node at runtime to scale out your environment, the new node automatically joins the existing NCache cluster and participates in the configured caches and state transfer process without requiring manual cache creation on that node.
