Remove Client Cache
A pre-existing, already registered Client Cache can be simply removed from the cluster it is a part of either through the NCache Management Center or using the Remove-ClientCache PowerShell cmdlet, both methods ensure the client cache is cleanly unregistered without affecting the main cluster. Removing a Client Cache clears local configuration metadata and prevents the client from using local synchronization, defaulting back to the clustered cache.
Using the NCache Management Center
Launch the NCache Management Center by browsing to http://localhost:8251 or
<server-ip>:8251.In the left navigation bar, click on Clustered Caches based on the cache which contains the Client Caches. Against the cache name, click on View Details.

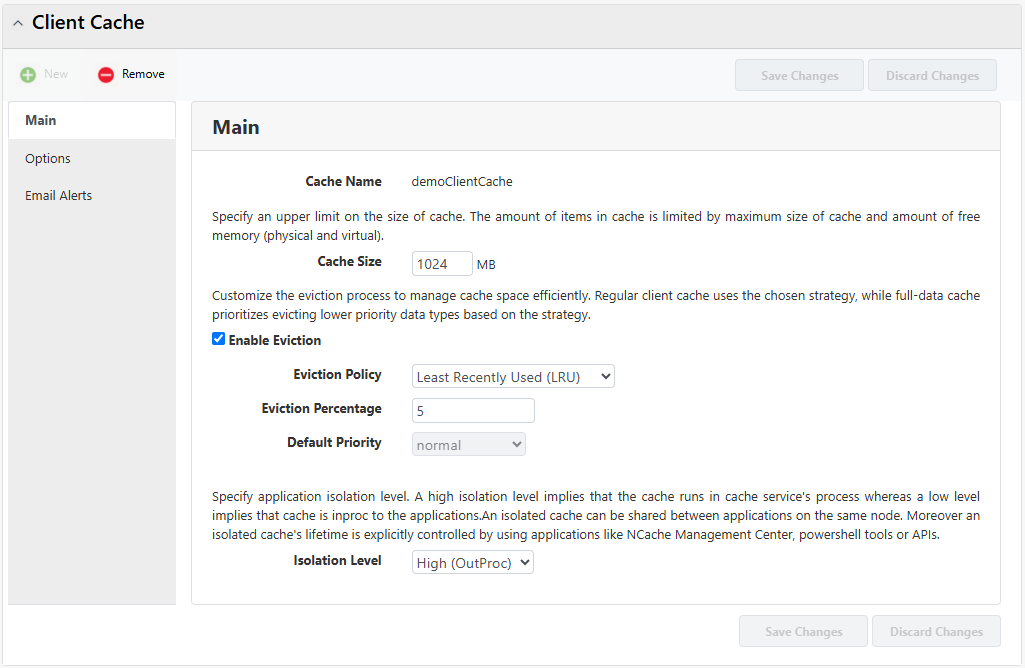
This opens up the detailed configuration page for the cache.
In the Client Nodes tab, select the Client Node IP for which the Client Cache must be removed.

- Click on "..." against the Client Node IP and select Remove.
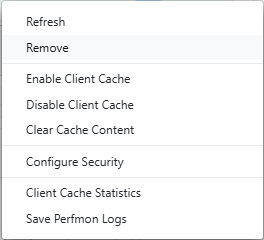
- You can also remove the Client Cache through the
 button under the Client Cache tab.
Using PowerShell
The Remove-ClientCache tool enables the user to remove an already existing Client Cache from the client node.
- This command removes the demoClientCache from client node 20.200.20.11.
Remove-ClientCache -CacheName demoCache -ClientCacheName demoClientCache \
                   -ClientNode 20.200.20.11
- This command removes Client Cache named demoClientCache on client node 20.200.20.11 for an already registered clustered cache on server 20.200.20.12.
Remove-ClientCache -CacheName demoCache -ClientCacheName demoClientCache \
                   -ClientNode 20.200.20.11 -Server 20.200.20.12
- This command specifies the port to remove Client Cache named demoClientCache on client node 20.200.20.12 for an already registered clustered cache on server 20.200.20.11.
Remove-ClientCache -CacheName demoCache -ClientCacheName demoClientCache \
                   -Server 20.200.20.11 -ClientNode 20.200.20.12 \
                   -Port 8250
- This command removes Client Cache named demoClientCache from client node 20.200.20.11 using security credentials.
Remove-ClientCache -CacheName demoCache -ClientCacheName demoClientCache -ClientNode 20.200.20.11 -Credentials (Get-Credential john_smith)
See Also
Create Client Cache
Enable Client Cache on Client Nodes
Disable Client Cache on Client Nodes
Management Operations